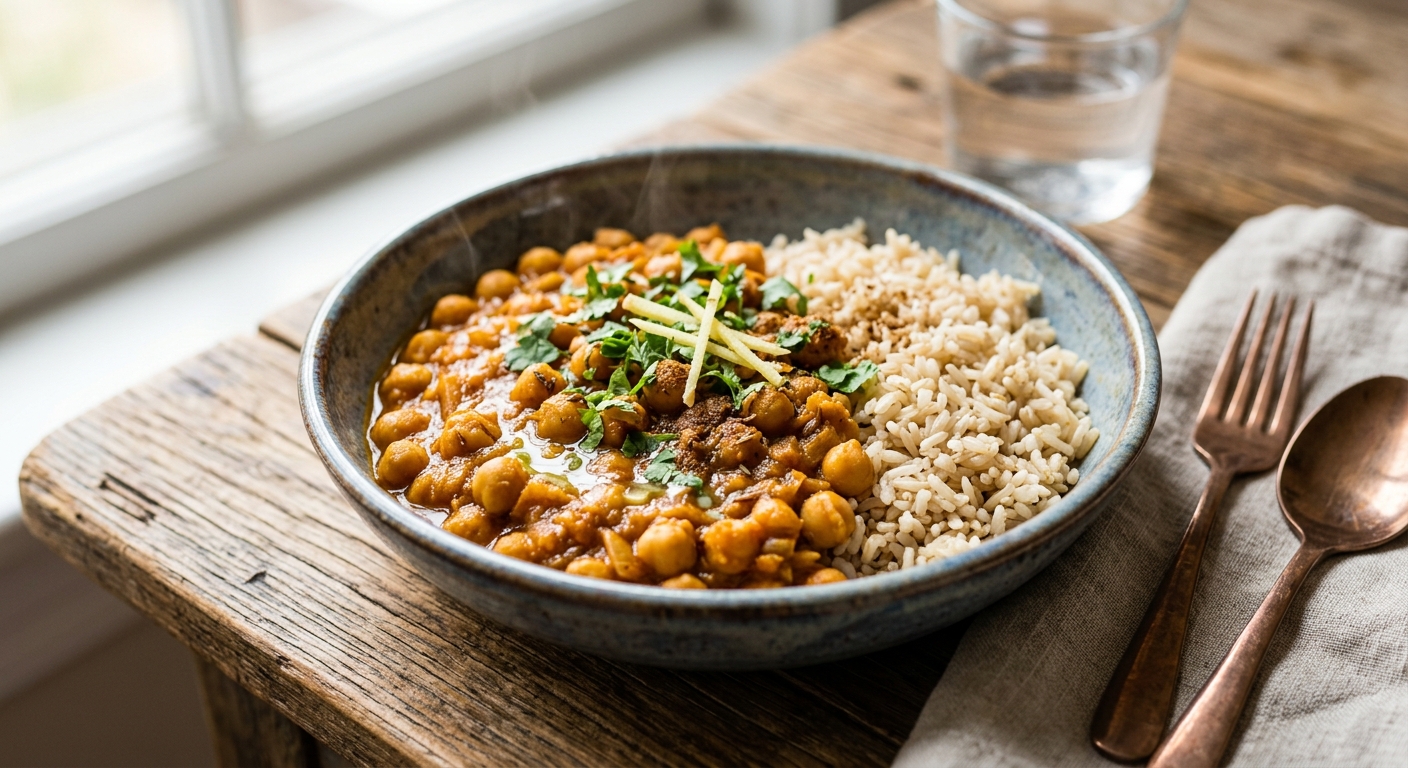
Chana Masala is one of the great dishes of Indian cuisine, a vibrant, deeply spiced chickpea curry that has sustained populations across the subcontinent for centuries. It is no accident that this humble legume dish has endured: chickpeas are among the most nutritionally dense plant foods on the planet, packing iron, folate, manganese, and complete-ish protein into every golden bite. Paired with fibre-rich brown rice, this meal achieves something rare in plant-based cooking, a genuinely satisfying, protein-complete dinner that also functions as a mineral powerhouse.
What makes this particular recipe exceptional from a nutritional standpoint is the deliberate pairing of iron-rich chickpeas with a tomato-onion base that is loaded with vitamin C. Non-heme iron, the form found in plants, is absorbed at only 2 to 20% efficiency on its own. But when consumed alongside vitamin C (ascorbic acid), absorption can increase by up to 300%, because ascorbic acid reduces ferric iron to the more bioavailable ferrous form. The crushed tomatoes, fresh lemon juice finish, and optional fresh coriander in this recipe are not just flavour choices; they are nutritional engineering. Each serving delivers approximately 7.6 mg of iron alongside 28 mg of vitamin C, making the iron in this dish far more bioavailable than a standard plant-based meal.
Brown rice replaces white rice here for good reason: it contributes magnesium, phosphorus, B vitamins, and additional fibre, while its lower glycemic index keeps the overall glycemic load of the meal in the moderate range despite the generous carbohydrate content. The spice blend, built on cumin, coriander, garam masala, and amchur (dried mango powder), is not decorative either. Cumin seeds alone contain notable iron, and many of the spices in this blend carry anti-inflammatory polyphenols that complement the dish’s antioxidant profile. This is calibrated cooking at its most delicious.
4
servings
Ingredients
- 800 gcanned chickpeas (2 x 400g cans), drained and rinsed
- 400 gcanned crushed tomatoes
- 300 gbrown basmati rice, rinsed
- 2 mediumyellow onions, finely diced
- 6 clovesgarlic, minced
- 30 gfresh ginger, peeled and finely grated
- 2 tbspextra-virgin olive oil or Avocado Oil100% Pure Avocado Oil
- 2 tspcumin seeds
- 1.5 tspground coriander
- 1.5 tspgaram masala
- 1 tspground turmeric
- 1 tspKashmiri chilli powder (or mild paprika for less heat)
- 1 tspamchur (dried mango powder) or 1 tsp tamarind paste
- 0.5 tspground cumin
- 240 mllow-sodium vegetable stock
- 2 tbspfresh lemon juice
- 20 gfresh coriander (cilantro), roughly chopped
- —Colima Sea SaltMicroplastic Free Salt and freshly ground black pepper to taste
Instructions
Click on an item below to shop for the recommended items for this recipe on Amazon.
As an Amazon Associate, we earn from qualifying purchases.
- Cook the brown basmati rice: combine the rinsed rice with 600 ml of cold water and a pinch of salt in a medium saucepan. Bring to a boil over high heat, then reduce to the lowest simmer, cover tightly, and cook for 35 to 40 minutes until all water is absorbed and the grains are tender. Remove from heat and let steam, covered, for 10 minutes before fluffing with a fork.
- While the rice cooks, heat the oil in a large, heavy-bottomed Dutch oven or deep skillet over medium-high heat. Once shimmering, add the cumin seeds and let them sizzle for 30 to 45 seconds until fragrant and just starting to darken. This blooming step is critical: it releases fat-soluble flavour compounds and activates the seeds’ iron content.
- Add the diced onions to the pot and cook, stirring occasionally, for 10 to 12 minutes over medium heat until they are deeply golden and beginning to caramelise at the edges. Do not rush this step; properly caramelised onions form the sweet, complex base that makes restaurant-quality chana masala. Season lightly with salt to draw out moisture.
- Push the onions to the sides of the pot and add the garlic and ginger to the centre. Cook for 90 seconds, stirring constantly, until the raw smell disappears and the mixture is fragrant. Stir together with the onions.
- Add the ground coriander, turmeric, Kashmiri chilli powder, and ground cumin to the onion mixture. Stir continuously for 1 to 2 minutes, toasting the spices directly in the oil. If the spices threaten to burn, add a splash of water. This dry-frying stage (known as bhunao) develops deep flavour and is a defining technique in Indian cooking.
- Pour in the crushed tomatoes and stir well to incorporate with the spiced onion base. Cook over medium heat, stirring frequently, for 8 to 10 minutes until the sauce has darkened, thickened, and the oil begins to separate and float at the surface. This separation signals that the masala base is fully cooked through.
- Add the drained chickpeas and vegetable stock to the pot. Stir thoroughly, bring to a gentle boil, then reduce heat to medium-low. Simmer uncovered for 15 to 18 minutes, stirring occasionally, until the sauce has thickened to a rich, clinging consistency and the chickpeas have absorbed the spiced flavour. Use the back of a wooden spoon to lightly crush about one-quarter of the chickpeas against the pot wall; this releases starch and naturally thickens the curry.
- Remove from heat and stir in the garam masala, amchur, and lemon juice. Taste and adjust salt. The garam masala is added at the end to preserve its delicate aromatic top notes, which evaporate with prolonged heat. Garnish with fresh coriander and serve immediately over the brown rice.
- Before loading the slow cooker, complete a critical stovetop pre-cook: heat the oil in a skillet over medium-high heat. Add the cumin seeds and sizzle for 30 seconds. Add the onions and cook for 8 to 10 minutes until golden. Add garlic and ginger and cook for 90 seconds. Add the ground coriander, turmeric, chilli powder, and ground cumin and stir-fry for 1 to 2 minutes until fragrant. Add the crushed tomatoes, stir well, and cook for just 3 minutes. Transfer this entire mixture to the slow cooker insert.
- Add the drained chickpeas and vegetable stock to the slow cooker. Stir everything together to combine evenly. The chickpeas should be mostly submerged in the spiced tomato base. Do not add the garam masala, amchur, or lemon juice yet; these finish ingredients will be added at the end.
- Place the lid on the slow cooker and cook on Low for 7 to 8 hours or on High for 3 to 4 hours. Resist the urge to lift the lid during cooking; each lift releases heat and adds 20 to 30 minutes to the cook time. The long, moist, low heat allows the chickpeas to soak up the spiced sauce deeply, creating a more complex flavour than faster methods.
- About 45 minutes before the chana masala is done, cook the brown rice on the stovetop: combine the rinsed rice with 600 ml of cold water and a pinch of salt in a medium saucepan. Bring to a boil, then reduce to the lowest simmer, cover tightly, and cook for 35 to 40 minutes until tender. Let rest, covered, for 10 minutes before fluffing.
- When the chana masala is ready, remove the lid. Use the back of a large spoon to crush about one-quarter of the chickpeas directly in the slow cooker insert to thicken the sauce naturally. If the curry looks too liquid, switch to the High setting with the lid slightly ajar for 20 to 30 minutes to reduce. Stir in the garam masala, amchur, and lemon juice. Taste and adjust salt. Serve over brown rice, garnished with fresh coriander.
- Set your Instant Pot or electric pressure cooker to Saute mode on High (or use the stovetop setting on a stovetop pressure cooker over medium-high heat). Add the oil and once shimmering, add the cumin seeds. Sizzle for 30 seconds until fragrant, then add the diced onions. Saute for 7 to 8 minutes, stirring frequently, until the onions are golden and softened.
- Add the garlic and ginger to the pot and saute for 90 seconds. Add the ground coriander, turmeric, Kashmiri chilli powder, and ground cumin. Stir-fry for 1 to 2 minutes, adding a tablespoon of water if the spices stick. Add the crushed tomatoes and stir vigorously to deglaze the bottom of the pot; scraping up any browned bits is essential here as any stuck residue can trigger the pressure cooker burn warning.
- Add the drained chickpeas and vegetable stock. Stir to combine. Cancel the Saute function. Secure the lid and set the pressure valve to Sealing. Cook on Manual (High Pressure) for 15 minutes. The pressure cooker will take approximately 8 to 10 minutes to come to pressure before the countdown begins.
- When the cooking cycle is complete, allow the pressure to release naturally for 10 minutes (leave the pot alone), then carefully switch the valve to Venting to release any remaining steam. This combination of natural and quick release prevents the chickpeas from bursting and keeps them pleasingly whole yet tender throughout.
- Meanwhile, while the pressure is releasing, cook the brown rice separately on the stovetop: combine the rinsed rice with 600 ml of cold water and a pinch of salt, bring to a boil, reduce to a low simmer, cover, and cook for 35 to 40 minutes. Note that brown rice cannot reliably be pressure-cooked alongside chickpeas due to differing water ratios and timing. Open the pressure cooker lid carefully, stir the chana masala, and crush about one-quarter of the chickpeas with the back of a spoon. If the sauce is thinner than desired, set the pot back to Saute on Low and simmer for 3 to 5 minutes uncovered. Stir in garam masala, amchur, and lemon juice. Season to taste and serve over the rice, garnished with fresh coriander.
- Preheat your oven to 180C (350F) with a rack positioned in the lower-middle position. Place a large Dutch oven on the stovetop over medium-high heat. Add the oil, heat until shimmering, then add cumin seeds and sizzle for 30 seconds. Add the diced onions and cook for 10 to 12 minutes over medium heat, stirring occasionally, until deeply golden.
- Add the garlic and ginger and stir for 90 seconds. Add the ground coriander, turmeric, Kashmiri chilli powder, and ground cumin and cook for 2 minutes, stirring constantly. Add the crushed tomatoes and cook for 5 minutes over medium heat, stirring regularly, until the masala base is thick and the oil just begins to separate. This stovetop pre-cook builds the essential flavour foundation before the oven takes over.
- Add the drained chickpeas and vegetable stock to the Dutch oven. Stir well to combine. Bring the mixture to a simmer on the stovetop, then immediately transfer the covered Dutch oven to the preheated oven.
- Bake covered for 35 minutes. Remove the lid and stir the curry. Return to the oven uncovered for a further 20 to 25 minutes. The uncovered phase is unique to the oven method: the dry oven heat concentrates the sauce from above while the residual liquid gently braises the chickpeas from below, creating a slightly thicker, more intensely flavoured curry with lightly crisped chickpeas at the sauce surface.
- While the curry bakes uncovered, start the brown rice on the stovetop: combine rinsed rice with 600 ml cold water and a pinch of salt, bring to a boil, reduce to the lowest simmer, cover tightly, and cook for 35 to 40 minutes. Let rest, covered, for 10 minutes. Remove the Dutch oven from the oven. Using a spoon, gently crush one-quarter of the chickpeas to thicken the sauce. Stir in the garam masala, amchur, and lemon juice. Taste and adjust salt. Serve over the brown rice, garnished generously with fresh coriander.
Nutrition Breakdown
Per 1 serving (makes 4)
Vitamins & Minerals
% Daily Value based on a 2,000 calorie diet (FDA reference)
🧬 Essential Amino Acids
% of recommended daily intake (RDA) per serving
🛡 Antioxidant Profile
The Nutrition Science
The central nutritional strategy of this recipe is the deliberate co-ingestion of non-heme iron and vitamin C. Chickpeas contain approximately 4.7mg of iron per 100g dry weight, making them one of the richest plant-based iron sources available. However, non-heme iron (the ferric Fe3+ form found in plants) must be converted to ferrous Fe2+ in the acidic environment of the duodenum before it can be transported across intestinal epithelial cells by the DMT-1 transporter. Vitamin C, present at 28mg per serving via the tomato base and fresh lemon juice finish, acts as a reducing agent that converts Fe3+ to Fe2+ directly in the gut lumen, bypassing the pH-dependent reduction step and dramatically increasing uptake. Research published in the American Journal of Clinical Nutrition demonstrates that 25mg of vitamin C consumed with a non-heme iron source can increase absorption by 65 to 300%, depending on baseline iron status.
Manganese deserves particular attention in this dish, where it reaches 122% DV per serving largely from chickpeas and brown rice. Manganese is an essential cofactor for manganese superoxide dismutase (MnSOD), the primary antioxidant enzyme within mitochondria, as well as for arginase (urea cycle), glutamine synthetase, and pyruvate carboxylase in gluconeogenesis. Its co-presence with iron is biochemically interesting: because manganese and iron share the DMT-1 intestinal transporter, very high supplemental doses of one can reduce absorption of the other. However, at the physiological amounts present in whole foods like this dish, this competitive interaction is minimal and unlikely to affect net mineral status in healthy adults.
The spice matrix in this recipe contributes more than flavour. Curcumin from turmeric has been demonstrated in multiple randomised trials to suppress the NF-kB inflammatory signalling cascade at concentrations achievable through dietary intake, particularly when consumed with piperine from black pepper, which inhibits glucuronidation and increases curcumin bioavailability by up to 2000%. The combination of cumin, coriander, and garam masala also provides modest but meaningful contributions to the dish’s total polyphenol load. Perhaps most elegantly, the amchur (dried mango powder) added at the finish introduces additional ascorbic acid alongside malic acid, a mild organic acid that further supports the reducing environment in the gut needed for optimal iron absorption, making every flavour choice in this recipe a nutritional choice as well.
Pro Tips
- For the highest iron absorption, avoid drinking tea or coffee within one hour before or after this meal. Tannins and polyphenols in tea bind non-heme iron in the gut and can reduce absorption by up to 62%. Water, lemon water, or a small glass of orange juice are ideal accompaniments.
- If you cannot find amchur, a teaspoon of tamarind paste or an extra squeeze of lemon at the end achieves a similar sour finish. Both provide additional organic acids that support the iron-absorption environment in the gut.
- To increase the protein content by approximately 6g per serving without adding meat, stir in 80g of rinsed and drained green or brown lentils alongside the chickpeas. They will cook down and thicken the sauce further while boosting the lysine content toward a more complete essential amino acid profile.

Love that you’re thinking strategically about this, Carey – and honestly, that’s the right instinct. While chana masala is iron-packed, chickpeas are higher in phytates and lectins that can be rough on inflamed guts, plus the fiber load during a flare might not cooperate. Have you considered trying this sauce over well-cooked lentils instead? They’re gentler, still give you that iron boost plus the vitamin C synergy, and many of my patients with IBD tolerate them way better during active inflammation. Once you’re in remission, you could absolutely reintroduce the chickpeas and get that full nutrient density back.
this looks amazing but im curious how you found it worked during flares? ive been dying to eat more iron rich foods but chickpeas tend to be really hard on my gut when im not in full remission, and brown rice can be tough too depending on the day. im definitely saving this for when im doing well because that vitamin c and iron combo is exactly what i need, but wondering if you have any thoughts on modifying it for less stable days or if the spices might be a trigger for some people with crohn’s?
oh this is such a smart recipe for iron optimization – that vitamin C from the tomato sauce with non-heme iron is exactly the combo i rely on to keep my ferritin up between lab tests. totally get careys concern though, the chickpea and brown rice combo can be rough on digestion, especially with flares. ive found that soaking chickpeas longer and cooking them super soft helps me, plus adding some ginger to the masala aids digestion too, but honestly some days my gut just says no to legumes and i have to pivot to something gentler like lentil soup or even fortified cereal with orange juice when im struggling.