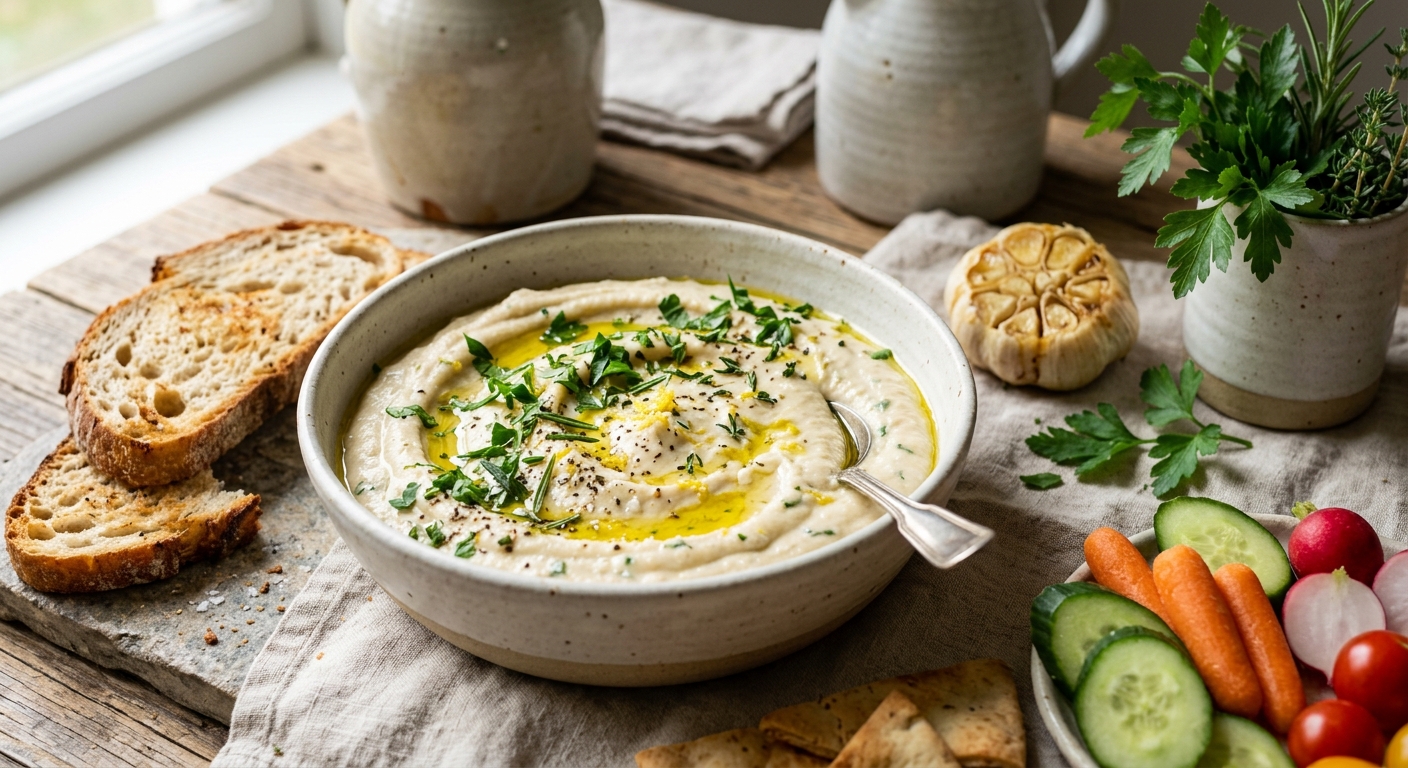
If hummus has been your go-to protein spread, prepare to meet its more sophisticated cousin. This white bean and herb dip transforms humble cannellini beans into a silky, pale gold spread that clings to warm flatbread, cradles roasted vegetables, and disappears from every party table within minutes. The secret lies in a two-step process: cooking the beans until they are genuinely falling-apart tender, then emulsifying them with high-quality extra-virgin olive oil and ice-cold water to create a mousse-like texture that store-bought versions simply cannot replicate.
From a nutritional standpoint, cannellini beans are one of the most complete plant foods available. A single serving of this dip provides 14 grams of protein, covering roughly 28 percent of the daily requirement for a sedentary adult, alongside 11 grams of dietary fiber that feeds the gut microbiome for hours after eating. Unlike many protein-dense foods, cannellini beans come packaged with folate, iron, magnesium, potassium, and zinc all in meaningful amounts, making this dip a genuine micronutrient delivery system disguised as party food.
The herb profile here is intentional and functional. Fresh rosemary contributes rosmarinic acid, one of the most potent antioxidants in the culinary world. Flat-leaf parsley adds a substantial hit of vitamin K and vitamin C. Lemon zest brightens every mouthful while its limonene compounds support liver detoxification pathways. Together, these ingredients turn a simple spread into something the nutrition science community would describe as synergistically bioavailable: each component actively helps the body absorb the nutrients in the others.
6
servings
Ingredients
- 400 gdried cannellini beans, soaked overnight and drained (or 2 x 400g cans, drained and rinsed)
- 1 whole headgarlic, top sliced off to expose cloves
- 4 tbspextra-virgin olive oil, plus extra for drizzling
- 2 tbspfresh lemon juice
- 1 tspfinely grated lemon zest
- 2 tbspfresh flat-leaf parsley, finely chopped
- 1 tspfresh rosemary leaves, finely minced
- 1 tspfresh thyme leaves
- 2 tbsptahini (sesame paste)
- 3 tbspice-cold water, plus more as needed
- 1 tspground cumin
- 0.5 tspsmoked paprika, for finishing
- 1 tspwhite wine vinegar
- —Colima Sea SaltMicroplastic Free Salt and freshly cracked black pepper to taste
Instructions
Click on an item below to shop for the recommended items for this recipe on Amazon.
As an Amazon Associate, we earn from qualifying purchases.
- If using dried beans, drain your overnight-soaked beans and transfer them to a large pot. Cover with fresh cold water by at least 8 cm. Bring to a rolling boil over high heat, skim off any grey foam that rises during the first 5 minutes, then reduce to a steady simmer. Cook uncovered for 60 to 75 minutes until the beans are completely tender and the skins are beginning to split. Reserve 120ml of the starchy cooking liquid before draining.
- While the beans cook, prepare the garlic. Place the whole garlic head (top sliced off) in a small dry saucepan over very low heat. Add 1 tablespoon of the olive oil, cover with a lid, and let the garlic steam-roast gently for 25 to 30 minutes, turning the head occasionally, until the cloves are deeply golden and completely soft when pierced with a skewer. Alternatively, wrap in foil and place directly on the stovetop burner grate on the lowest setting. Allow to cool for 10 minutes, then squeeze all softened cloves out of their papery skins into a small bowl.
- If using canned beans, warm them in a saucepan over medium-low heat with 60ml water for 8 to 10 minutes until heated through and very soft. Drain, reserving the warm liquid. Warm beans blend far more smoothly than cold ones straight from the can.
- Transfer the drained, still-warm beans to a food processor along with the roasted garlic, tahini, lemon juice, lemon zest, white wine vinegar, cumin, and a generous pinch of fine sea salt. Process for 1 minute until the mixture forms a thick, rough paste.
- With the processor running, drizzle in the olive oil in a slow, steady stream, then add the ice-cold water one tablespoon at a time, processing for a full 3 to 4 minutes total. The extended processing time is essential: it aerates the mixture and breaks down the bean cell walls to create a genuinely mousse-like texture. Add reserved cooking liquid a splash at a time if you prefer a looser consistency.
- Taste and adjust seasoning. Fold in the rosemary and thyme by hand, then pulse in the parsley two or three times so green flecks remain visible. Transfer to a serving bowl, use the back of a spoon to create a deep well in the centre, drizzle generously with olive oil, scatter smoked paprika over the top, and finish with cracked black pepper and extra fresh parsley.
- Drain and rinse your overnight-soaked dried beans. Place them in the slow cooker insert. Nestle the whole garlic head (top sliced to expose cloves) cut-side-down directly on top of the beans. The garlic will slow-roast in the steam alongside the beans, developing a mellow, caramelised flavour that is distinctly different from stovetop-softened garlic.
- Pour in enough cold water to cover the beans by 5 cm (approximately 1.2 litres for a standard 4-litre slow cooker). Add the ground cumin and fresh thyme directly to the water. Do not add salt at this stage. Place the lid on and cook on Low for 8 to 10 hours or on High for 4 to 5 hours. The beans are ready when they are completely tender and the garlic cloves yield without any resistance.
- Once cooking is complete, use a ladle to remove and reserve 180ml of the fragrant cooking liquid. Carefully lift out the garlic head using tongs, allow it to cool for 5 minutes, then squeeze the softened cloves into a small bowl. Drain the beans through a colander.
- The slow-cooked beans will be exceptionally soft and almost pre-mashed, which means they will process into an ultra-smooth dip with minimal effort. Transfer them while still very warm to a food processor with the roasted garlic, tahini, lemon juice, lemon zest, white wine vinegar, and a generous pinch of salt.
- Process for 2 minutes, then with the machine running, stream in the olive oil followed by the ice-cold water, tablespoon by tablespoon, processing for a further 2 minutes until the dip is pale, light, and completely smooth. Use the reserved slow-cooker liquid to adjust consistency. Fold in rosemary by hand, pulse in parsley briefly, taste for seasoning, and finish with a drizzle of olive oil, smoked paprika, and cracked black pepper.
- For the fastest route to perfectly cooked dried beans, no overnight soak is needed in a pressure cooker. Rinse the dried beans well and place them directly in the pressure cooker pot. Add the whole garlic head (top sliced off) cut-side-up, 1 litre of cold water, the cumin, and the thyme sprigs. Do not add salt yet.
- Seal the lid and set the valve to Sealing. Select the Bean or Manual setting and cook at High Pressure for 35 minutes. Allow the pressure to release naturally for 15 minutes (this slow depressurisation continues cooking the beans gently and prevents the skins from bursting violently), then carefully switch the valve to Venting to release any remaining steam.
- Open the lid and test a bean by pressing it between your fingers: it should crush with virtually no resistance. If not, reseal and cook for a further 5 minutes at High Pressure with a quick release. Carefully remove the garlic head with tongs, cool slightly, then squeeze out the softened cloves. Reserve 180ml of the intensely flavoured cooking liquid, then drain the beans.
- Working quickly while the beans are still hot, transfer them to a high-powered blender (preferred for maximum smoothness) or food processor along with the roasted garlic, tahini, lemon juice, lemon zest, white wine vinegar, salt, and 2 tablespoons of the reserved cooking liquid. Blend on high for 90 seconds.
- With the blender running on medium speed, slowly pour in the olive oil through the feed cap, then add the ice-cold water. Increase to high speed and blend for a further 2 minutes until the dip is completely velvety. The pressure-cooked beans yield an especially creamy result because the high-heat environment breaks down bean cell walls more thoroughly than any other method. Adjust seasoning, fold in the rosemary and parsley, and finish with olive oil, smoked paprika, and black pepper.
- Preheat the oven to 200C (180C fan / 400F / Gas Mark 6). Place the whole garlic head cut-side-up in the centre of a small square of aluminium foil. Drizzle 1 tablespoon of the olive oil directly over the exposed cloves, add a pinch of salt, and seal the foil into a tight parcel. Place on a small baking sheet and roast for 40 to 45 minutes until deeply golden, caramelised, and completely soft. The garlic should smell nutty and sweet, not sharp. Set aside to cool for 10 minutes.
- While the garlic roasts, spread your drained and rinsed canned cannellini beans in a single layer on a separate small rimmed baking sheet. Drizzle with 1 tablespoon of olive oil, season lightly with salt, and place in the oven for the final 15 minutes of the garlic roasting time. This lightly dehydrates the bean surfaces and concentrates their flavour, creating a roasted-bean depth that is unique to this method. Remove from the oven and allow to cool for only 5 minutes so they stay warm.
- Squeeze the caramelised garlic cloves from their skins into a food processor. Add the warm roasted beans, tahini, lemon juice, lemon zest, white wine vinegar, cumin, and a generous pinch of fine sea salt. Process for 1 minute until a thick paste forms.
- With the processor running, drizzle in the remaining 3 tablespoons of olive oil in a thin stream, then add the ice-cold water one tablespoon at a time, blending for a total of 3 to 4 minutes. The oven-roasted beans create a slightly more rustic, nuttier-flavoured dip compared to the other methods, with a warm golden hue from the caramelised garlic.
- Taste carefully and adjust salt, lemon, and acidity as needed. Fold in the rosemary and thyme by hand, then pulse in the parsley two or three times. Transfer to a serving bowl, create a well with the back of a spoon, drizzle generously with your best extra-virgin olive oil, dust with smoked paprika, and finish with cracked black pepper and a few extra parsley leaves.
Nutrition Breakdown
Per 1 serving (makes 6)
Vitamins & Minerals
% Daily Value based on a 2,000 calorie diet (FDA reference)
🧬 Essential Amino Acids
% of recommended daily intake (RDA) per serving
🛡 Antioxidant Profile
The Nutrition Science
Cannellini beans are botanically classified as Phaseolus vulgaris and rank among the most nutritionally dense legumes by weight. Their exceptional folate content (approximately 180 mcg per 100g cooked) supports one-carbon metabolism, a biochemical cycle essential for DNA synthesis, methylation reactions, and the regulation of homocysteine levels in the blood. Elevated homocysteine is an independent risk factor for cardiovascular disease, and regular legume consumption is one of the most evidence-backed dietary strategies for keeping it in the healthy range.
The resistant starch fraction in white beans deserves particular attention. Unlike digestible starches that spike blood glucose, resistant starch travels intact to the large intestine where it acts as a selective prebiotic, feeding Bifidobacterium and Lactobacillus species and stimulating the production of short-chain fatty acids, particularly butyrate. Butyrate is the primary energy source for colonocytes (colon cells) and plays a critical role in maintaining the intestinal barrier, reducing gut permeability, and modulating systemic inflammation. Processing the beans into a smooth dip does reduce resistant starch slightly compared to whole cooked beans, but the soluble fibre matrix remains largely intact and continues to slow gastric emptying and glucose absorption.
The combination of tahini with legumes in this recipe is a nutritional strategy rooted in amino acid complementation. Cannellini beans are relatively lower in the sulphur-containing amino acids methionine and cysteine, while sesame seeds (the base of tahini) are an excellent source of both. Consuming them together in a single dish creates a more complete essential amino acid profile than either food provides independently, approaching the quality of animal-sourced protein. The olive oil in this recipe is not merely a carrier of flavour: its oleocanthal content inhibits cyclooxygenase enzymes (COX-1 and COX-2) by the same mechanism as non-steroidal anti-inflammatory drugs, while its monounsaturated fatty acids enhance the absorption of the fat-soluble antioxidants present in the fresh herbs.
Pro Tips
- For the absolute smoothest texture, peel the skins off your cooked beans before blending. It takes 5 extra minutes but produces a dip with the consistency of high-end restaurant fare. Simply pinch each cooked bean between your fingers and the skin slips off.
- Ice-cold water is not optional. The temperature contrast with the warm beans causes the emulsification to tighten and the mixture to aerate, which is what creates the mousse-like lift. Warm water produces a denser, heavier result.
- This dip improves dramatically after resting in the refrigerator for at least 2 hours, as the flavours meld and the emulsion stabilises. Make it the day before serving if possible. It keeps refrigerated for up to 5 days and the olive oil on top acts as a natural preservative seal.


solid recipe, but curious on your mineral profile here – white beans are decent for magnesium but theyre also loaded with phytates that can block zinc absorption. are you soaking/sprouting the beans before cooking or just canned? ive found a quick soak then drain makes a huge difference for bioavailability, especially if someones already mineral-depleted. the garlic and lemon help a ton too but wanted to know your take on prep method since most people just dump canned beans straight in
omg zack brings up such a good point about prep method. during my worst flare years i was just dumping canned beans into everything and wondering why my gut was so angry, but once i started soaking dried beans properly and honestly even just rinsing canned ones really well, the difference was noticeable. that said for me personally the fiber content is almost secondary to whether im in remission or flaring, so id be curious if this recipe works better with canned since theyre already softer on digestion, or if the soaking/sprouting route is actually gentler for active inflammation? the roasted garlic sounds amazing either way but thats usually one of my trigger foods so im already thinking
Great question from Zack on the prep method, that mineral bioavailability piece really matters. I’ve noticed in my own work that properly sprouted or fermented beans make a tangible difference in how my body responds to them, especially when stress is already taxing my mineral status. If you’re using canned here, a quick rinse helps, but soaking dried beans overnight then draining before cooking would unlock more of that magnesium and zinc your nervous system actually needs when you’re managing stress. Have you considered blending in some fresh herbs like oregano or thyme for their mineral density too, or maybe even a pinch of a mineral-rich mushroom powder to round out the micronutrient profile