Bone broth is one of the oldest functional foods in human history, and modern nutritional science is now catching up to what traditional cultures understood intuitively: simmering bones low and slow releases an extraordinary spectrum of minerals and structural proteins that no supplement can fully replicate. The collagen in connective tissue breaks down into gelatin and free amino acids, particularly glycine, proline, and hydroxyproline, which are the precise building blocks your body uses to synthesise new cartilage, tendons, ligaments, and skin matrix. A properly made bone broth will gel when chilled, and that wobble is your visual confirmation that the collagen extraction was successful.
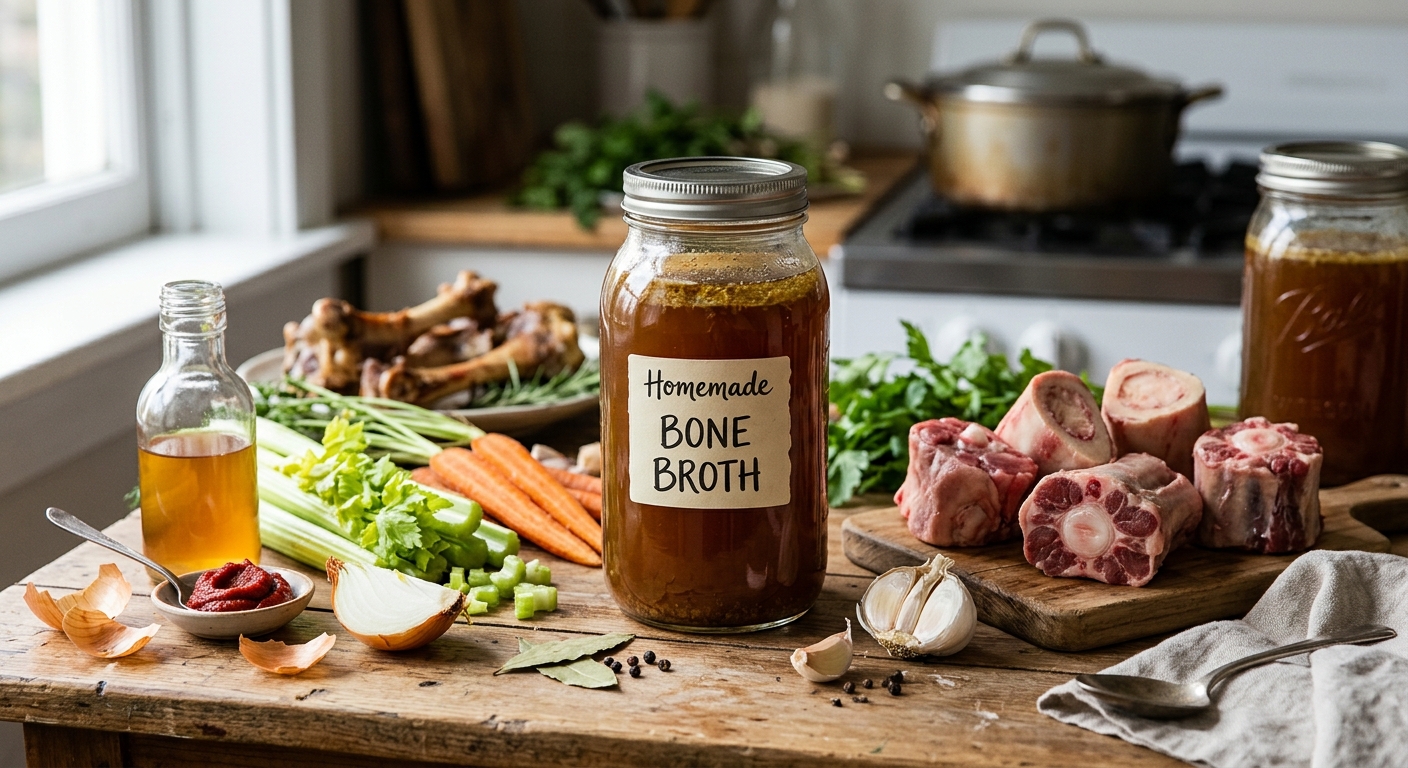
What sets this Calibrated Cuisine version apart is the initial oven-roasting step applied to the bones before any liquid is added. Roasting drives the Maillard reaction across the bone surfaces and marrow, producing hundreds of flavour compounds while simultaneously breaking down the periosteum, the fibrous membrane surrounding the bone, which accelerates mineral leaching into the final broth. The result is a broth that is not merely pale and watery but deep amber, complex, and genuinely savoury. A splash of apple cider vinegar during the first hour of cooking provides the mild acidity needed to chelate calcium and magnesium from the bone matrix, measurably increasing the mineral content of the finished broth.
This recipe is designed for batch cooking. A single batch yields approximately 2.5 litres of finished broth that freezes perfectly for up to six months, meaning one session of active cooking provides weeks of nutritional infrastructure. Use it as a base for soups and stews, as a braising liquid, stirred into rice or grains during cooking, or simply warmed in a mug as a daily mineral tonic. Every method below, whether you choose the stovetop, slow cooker, pressure cooker, or oven, is calibrated to maximise gelatin and mineral yield from the same ingredient list.
10
servings
Ingredients
- 1500 gmixed beef bones (knuckles, marrow bones, and oxtail), cut into segments
- 2 tbspapple cider vinegar
- 2 mediumyellow onions, quartered (skins on)
- 3 mediumcarrots, scrubbed and halved
- 3 stalkscelery with leaves, roughly chopped
- 1 wholegarlic head, halved horizontally
- 2 tbsptomato paste
- 2 wholebay leaves
- 1 tspwhole black peppercorns
- 4 sprigsfresh thyme
- 4 sprigsfresh flat-leaf parsley (stems included)
- 2 tbspextra-virgin olive oil
- 3 litrescold filtered water (adjust per method)
- —Colima Sea SaltMicroplastic Free Salt to taste, added only after straining
Instructions
Click on an item below to shop for the recommended items for this recipe on Amazon.
As an Amazon Associate, we earn from qualifying purchases.
- Preheat your oven to 220C (425F). Arrange the bones in a single layer across two large rimmed baking sheets. Drizzle with olive oil and rub lightly to coat. Roast for 25 to 30 minutes, turning once at the halfway point, until the bones are deeply browned and caramelised but not charred. Transfer the roasted bones to your largest stockpot (at least 8 litres capacity). Do not discard the baking sheets.
- Set the baking sheets over two burners on medium-high heat. Add about 250ml of cold water to each sheet and use a wooden spoon to scrape up all the dark, sticky fond from the bottom. Pour these deglazing liquids directly into the stockpot, as this concentrated flavour and mineral residue is too valuable to waste.
- Add the onions, carrots, celery, garlic, bay leaves, peppercorns, thyme, and parsley to the pot. Stir in the tomato paste. Pour in the cold filtered water until all ingredients are submerged by at least 5cm. Add the apple cider vinegar. Do not add salt at this stage. Allow the pot to sit at room temperature for 30 minutes so the vinegar can begin drawing minerals from the bones before any heat is applied.
- Place the pot over medium-high heat and bring it slowly to just below a boil, which will take 25 to 35 minutes. As the liquid approaches boiling, a significant amount of grey-brown foam and impurities will rise to the surface. Using a fine-mesh skimmer or large spoon, skim this foam diligently every few minutes until the liquid is mostly clear. This step is essential for a clean-flavoured, non-cloudy broth.
- Once skimmed and approaching a boil, reduce the heat to the lowest setting that maintains a bare simmer, meaning only one or two bubbles breaking the surface per second. Partially cover the pot with the lid slightly ajar to allow some evaporation and concentration of flavour. Simmer for a minimum of 12 hours and up to 18 hours. Check every 2 to 3 hours, skimming any fat or foam that accumulates, and add a cup of water if the liquid level drops below the bones.
- After the full simmering time, the broth should be a rich amber colour and the bones should feel porous and light. Remove and discard all solids using tongs or a slotted spoon. Pour the broth through a fine-mesh strainer lined with a double layer of cheesecloth into a large heatproof bowl or second stockpot. Press gently on the solids to extract the final liquid. Season with fine sea salt to taste. Cool rapidly by placing the container in an ice bath, then refrigerate overnight. The following day, lift off and discard the solidified fat cap from the surface, revealing the rich amber gelatin-set broth beneath. Reheat portions as needed.
- Roast the bones as directed: preheat your oven to 220C (425F), arrange bones on oiled rimmed baking sheets, and roast for 25 to 30 minutes, turning once, until deeply caramelised. Transfer the roasted bones to your slow cooker insert. Deglaze the baking sheets with a small amount of water, scraping up all the fond, and pour the deglazing liquid into the slow cooker.
- Layer the onions, carrots, celery, garlic, bay leaves, peppercorns, thyme, parsley, and tomato paste over and around the bones in the slow cooker. The order does not matter here since there is no active stirring involved, but placing the vegetables on top of the bones helps keep them submerged.
- Pour in cold filtered water, filling the slow cooker to within 2.5cm of the rim (approximately 2.5 to 3 litres depending on your model). Add the apple cider vinegar. The sealed slow cooker environment means almost no evaporation will occur, so you do not need to add water during cooking. Place the lid firmly on the slow cooker.
- Cook on Low for 24 hours for a good broth or 36 hours for the most gelatinous, mineral-dense result. The longer extraction is genuinely worth the wait if your schedule permits. Resist the urge to lift the lid during cooking, as each opening releases heat and extends the effective extraction time.
- When the cooking time is complete, turn off the slow cooker and allow it to cool for 30 minutes with the lid on. This resting period helps the fats and proteins settle, making the subsequent straining cleaner. Carefully ladle out the bones and large vegetable pieces first to reduce the weight before lifting the hot insert. Strain the broth through a fine-mesh strainer lined with cheesecloth into a large bowl. Season with sea salt, cool in an ice bath, then refrigerate. Remove the solidified fat cap the following day before portioning and storing.
- Roast the bones as directed: preheat your oven to 220C (425F), coat bones lightly in olive oil, and roast on rimmed baking sheets for 25 to 30 minutes until deeply browned. Deglaze the baking sheets with water, scraping up the fond. Transfer roasted bones and deglazing liquid to the Instant Pot insert.
- Add the onions, carrots, celery, garlic, bay leaves, peppercorns, thyme, parsley, and tomato paste to the pot. Add the apple cider vinegar. Pour in cold filtered water up to the two-thirds maximum fill line, approximately 2 to 2.2 litres. Do not exceed this line, as the bones and connective tissue release significant amounts of collagen-rich liquid during pressurised cooking, and overfilling creates a risk of the steam valve becoming blocked.
- Secure the Instant Pot lid and set the steam release valve to the Sealing position. Select the Pressure Cook (or Manual) function and set to High Pressure for 3 hours (180 minutes). The pot will take approximately 20 to 25 minutes to come up to full pressure before the timer begins. During this come-up phase, do not open the lid.
- When the 3-hour cook time is complete, allow the pressure to release naturally for at least 30 minutes before carefully turning the steam valve to Venting to release any remaining pressure. Natural pressure release is important here because rapid venting of a large liquid batch can cause liquid to spit from the valve. Once the float pin drops, it is safe to open the lid.
- Strain the broth through a cheesecloth-lined fine-mesh strainer into a large heatproof container, pressing on the solids. Season with sea salt to taste. The broth from the pressure cooker often appears more opaque than the stovetop version; for a clearer result, allow it to cool completely in the refrigerator, then pass it through cheesecloth a second time once chilled. Remove the fat cap the next day before storing or using.
- You will complete two roasting stages in the oven sequentially. Start by preheating your oven to 220C (425F). Arrange the bones on rimmed baking sheets, drizzle with olive oil, and roast for 25 to 30 minutes, turning once, until deeply browned. Transfer the roasted bones to a large heavy Dutch oven (at least 7 litres capacity) along with the deglazing liquid from the baking sheets. Leave the oven on.
- Add the onions, carrots, celery, garlic, tomato paste, bay leaves, peppercorns, thyme, and parsley to the Dutch oven. Pour in the cold filtered water to submerge the bones by at least 4cm. Add the apple cider vinegar. Set the Dutch oven over a stovetop burner on medium heat and bring the liquid just to a simmer, skimming the grey foam from the surface for 10 to 15 minutes until mostly clear. This brief stovetop skim is what distinguishes the oven method from simply placing a cold pot in the oven, and it makes a significant difference to the clarity of the finished broth.
- Once skimmed, place the tightly lidded Dutch oven on the lowest rack of the oven and reduce the temperature to 95C (200F). At this temperature, the broth will maintain a gentle, consistent simmer without boiling, and the sealed Dutch oven prevents any evaporation. Cook for 8 to 10 hours. There is no need to check or stir during this time, making this the most hands-off method after the initial setup.
- After 8 to 10 hours, remove the Dutch oven from the oven. The broth should be a beautiful deep amber and the bones should be porous and chalky. Allow the pot to cool with the lid on for 20 minutes. Using tongs, remove the large bones and vegetable pieces. Strain the remaining broth through a cheesecloth-lined fine-mesh strainer into a large bowl, pressing the solids gently. Season with sea salt. Cool in an ice bath, then refrigerate overnight before removing the fat cap and portioning into storage containers.
Nutrition Breakdown
Per 1 serving (makes 10)
Vitamins & Minerals
% Daily Value based on a 2,000 calorie diet (FDA reference)
🧬 Essential Amino Acids
% of recommended daily intake (RDA) per serving
🛡 Antioxidant Profile
The Nutrition Science
The nutritional power of bone broth begins at the molecular level with collagen, the most abundant structural protein in mammals, comprising roughly 30% of total body protein. Bone, cartilage, tendons, and the periosteum surrounding bones are dense repositories of Type I and Type II collagen. When submerged in slightly acidified water and subjected to prolonged heat, the triple-helix collagen molecule unwinds through hydrolysis, releasing gelatin and individual amino acids, most notably glycine, proline, and hydroxyproline. These are the exact precursor amino acids required by fibroblasts and chondrocytes to build new extracellular matrix in joints, cartilage, and connective tissue throughout the body. Clinical trials on hydrolysed collagen supplementation, which is biochemically identical to the gelatin in a properly made bone broth, have demonstrated statistically significant reductions in joint pain and improvements in cartilage thickness scores in subjects with osteoarthritis.
The apple cider vinegar inclusion is not merely traditional: it is chemistry. Bone mineral is predominantly hydroxyapatite, a crystalline calcium phosphate compound. Acetic acid, even in the modest concentrations provided by two tablespoons of vinegar in three litres of water, acts as a chelating agent that disrupts the ionic bonds in the hydroxyapatite crystal lattice, releasing free calcium, phosphorus, and magnesium ions into solution. Research measuring mineral content of broths made with and without an acidic medium consistently shows significantly higher mineral concentrations in acid-assisted extractions. The vinegar flavour itself fully dissipates during cooking, leaving no detectable taste in the finished broth.
The tomato paste added to this recipe serves a dual functional role. It contributes glutamic acid, a naturally occurring amino acid that is the primary driver of the umami flavour profile, and it provides lycopene and other carotenoids that are fat-soluble and partition into the small amount of surface fat during cooking, where they remain bioavailable when the broth is consumed or used in cooking. The roasting step that browns the bones produces Maillard reaction products, including melanoidins, which have demonstrated prebiotic and antioxidant activity in emerging gut microbiome research, adding yet another layer of functional benefit to what might appear at first glance to be a simple, humble broth.
Pro Tips
- The single most reliable quality indicator for bone broth is whether it sets to a firm gel when refrigerated. If your broth is liquid when cold, it is low in gelatin. To improve gelling, increase the proportion of knuckle and joint bones (which are rich in cartilage) relative to flat marrow bones, and ensure you are not adding too much water relative to bone weight.
- Freeze bone broth in ice cube trays first, then transfer the frozen cubes to zip-lock bags. This gives you single-tablespoon portions that can be added directly to pan sauces, stir-fries, and grain cooking without needing to thaw an entire jar.
- For the clearest possible broth regardless of cooking method, always start with cold water, skim diligently during the initial come-up-to-temperature phase, and never allow the broth to reach a rolling boil during extended cooking. Boiling agitates fat droplets and proteins into the liquid, creating permanent cloudiness that straining cannot fully resolve.

Oh, this is wonderful timing! I’ve been making bone broth the traditional way for years, but I’m so glad to see the science backing up what our grandmothers always knew. I’m planning to feature a collagen-forward broth in next month’s class, and I love how you’ve emphasized the roasting step, since that develops so much more flavor complexity than simmering raw bones. My students are always surprised how much more satisfying the broth tastes when we take that extra care, and now I can show them it’s not just tastier but actually extracting more of those minerals they need. Do you have thoughts on whether beef versus poultry bones shift the mineral profile meaningfully, or
oh this resonates so deeply with me, especially as someone whos spent years learning how fascia and connective tissue actually *feel* in the body through asana practice. theres something so grounding about sipping warm broth before practice because you can literally sense how it supports your joints ability to move with more ease and lubrication, and i love that the science is finally catching up to what so many cultures have always understood intuitively. your point about our grandmothers knowing this all along really gets me – theres such wisdom in returning to these foundational foods as an act of self care, not just optimization.
this is exactly what my avó used to make every sunday, and honestly reading the science behind it now just hits different, you know? she’d say the broth was “good for your bones and your belly” and i was like sure grandma, but then i learned about the amino acid profile and the gelatin actually feeding your gut lining and i was like… she knew. she just knew without needing a study to tell her. the bioavailable minerals piece is huge too because its not just about having calcium in there, its about your body actually being able to use it. if you’re batch cooking, roasting those bones first really does make a difference in both flavor and nutrient density, totally worth the extra step