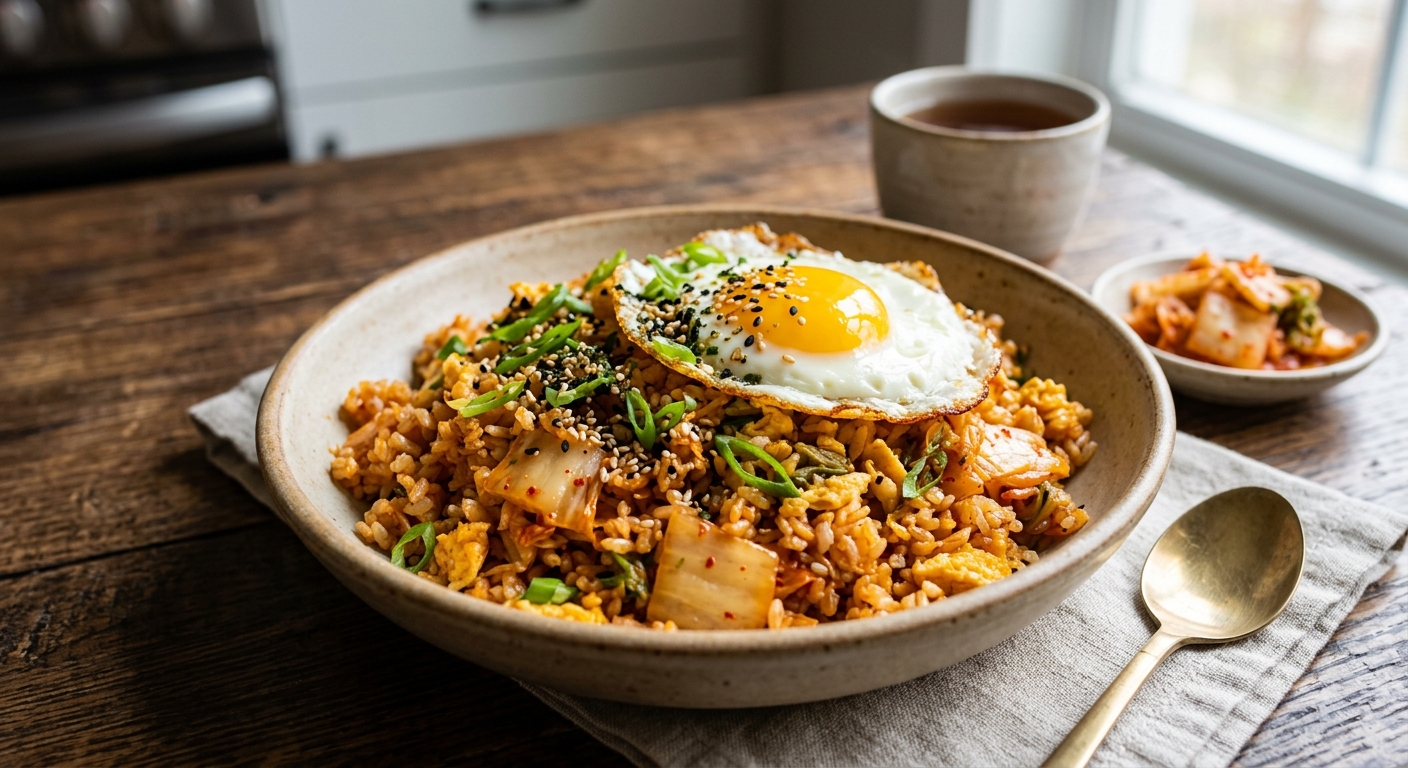
Fried rice for breakfast might sound unconventional to Western palates, but across Korea, Japan, and much of Southeast Asia, a hot bowl of rice in the morning is as natural as pouring a bowl of cereal. When you add kimchi, that deeply fermented, chili-spiked cabbage condiment, you transform a humble leftover-rice situation into one of the most nutritionally dense breakfasts imaginable. The fermentation process that gives kimchi its characteristic sour funk also produces billions of Lactobacillus bacteria, short-chain fatty acids, and bioactive peptides that actively calm intestinal inflammation before your day even begins.
What makes this dish sing beyond the gut-health angle is the synergy of its ingredients. Cold day-old rice has a significantly higher resistant starch content than freshly cooked rice, meaning it feeds beneficial gut bacteria as a prebiotic while blunting the glycemic response. The eggs contribute roughly 147mg of choline per serving, supporting liver function and neurotransmitter synthesis. Gochugaru, the Korean red pepper flakes that season both the kimchi and the finishing seasoning, delivers capsaicin alongside a meaningful dose of vitamin C, a combination that simultaneously boosts metabolism and enhances the absorption of the dish’s non-heme iron. Toasted sesame oil, added only off the heat, preserves its delicate sesamol and sesamin antioxidants, which have demonstrated measurable reductions in inflammatory cytokine markers in clinical studies.
This is a dish that rewards technique as much as ingredient quality. The single most important rule in fried rice cookery is heat, and lots of it. A screaming-hot wok or heavy skillet creates the Maillard reaction on the rice grains, giving each kernel a lightly toasted, almost nutty exterior while keeping the center tender. We have also developed slow cooker and pressure cooker adaptations that, while they cannot replicate that wok-charred quality, produce a deeply savory kimchi rice porridge and a steamed egg-rice cake respectively, each with its own compelling texture and concentrated flavor profile perfectly suited to meal prepping a week of anti-inflammatory mornings.
4
servings
Ingredients
- 600 gcooked short-grain white or brown rice, refrigerated overnight (about 220g dry)
- 200 gwell-fermented kimchi, roughly chopped, plus 3 tbsp kimchi brine reserved
- 4 largeeggs
- 2 tbspAvocado Oil100% Pure Avocado Oil (avocado or sunflower), divided
- 1 tbsptoasted sesame oil
- 3 clovesgarlic, minced
- 2 tspfresh ginger, grated
- 1 tbspgochujang (Korean fermented chili paste)
- 1 tspgochugaru (Korean red pepper flakes)
- 2 tbsplow-sodium soy sauce or tamari
- 3 stalksscallions, thinly sliced, whites and greens separated
- 1 tspwhite sesame seeds, toasted
- 1 sheetnori (dried seaweed), cut into thin strips (optional, for garnish)
- —Colima Sea SaltMicroplastic Free Salt and white pepper to taste
Instructions
Click on an item below to shop for the recommended items for this recipe on Amazon.
As an Amazon Associate, we earn from qualifying purchases.
- Remove the cold rice from the refrigerator and break up any large clumps with your fingers or a fork, spreading it loosely on a plate or tray. Cold, separated grains fry evenly and will not steam and clump in the pan.
- Heat a wok or large cast iron skillet over the highest flame available for 2 full minutes until it is visibly smoking. Add 1 tablespoon of neutral oil and swirl to coat. Crack all 4 eggs directly into the wok, let them set for 15 seconds undisturbed, then scramble them vigorously with a spatula into large, barely-set curds. Remove the eggs to a bowl before they finish cooking, as they will carry over in the residual heat. Set aside.
- Add the remaining 1 tablespoon of neutral oil to the same wok over high heat. Add the scallion whites, garlic, and ginger and stir-fry for 45 seconds until fragrant but not browned. Add the chopped kimchi and gochujang and stir-fry for 2 minutes, pressing the kimchi against the hot surface to caramelise its sugars and concentrate its flavour.
- Add all the cold rice to the wok in one even layer. Press it down firmly with the back of your spatula and let it sit undisturbed on high heat for 90 seconds to develop a crust on the bottom. Flip sections and press again, repeating this press-and-flip motion for 3 to 4 minutes total until many grains have a toasted, golden exterior.
- Drizzle the reserved kimchi brine and soy sauce over the rice and toss rapidly to distribute. Add the gochugaru and fold in the reserved scrambled eggs, breaking them gently into bite-sized pieces. Taste and adjust salt.
- Remove from heat. Drizzle the sesame oil over the top (never add it during cooking, as heat destroys its delicate antioxidant compounds). Divide into bowls and garnish with scallion greens, toasted sesame seeds, and nori strips if using. Serve immediately.
- Lightly grease the insert of a 4 to 6 quart slow cooker with a small amount of neutral oil. Place the cold cooked rice into the insert and use a wooden spoon to break it up as evenly as possible.
- Add the chopped kimchi, reserved kimchi brine, gochujang, gochugaru, soy sauce, garlic, ginger, and scallion whites directly to the rice. Pour in 480ml (2 cups) of water or unsalted chicken or vegetable broth to allow the rice to absorb liquid and develop a porridge consistency. Stir everything together thoroughly.
- Place the lid on the slow cooker and cook on Low for 3 to 4 hours, stirring once at the halfway point. The rice will break down partially and absorb the kimchi-seasoned liquid, developing a rich, concentrated flavour that stove-frying cannot replicate.
- In the final 20 minutes of cooking, use a spoon to make 4 shallow wells in the surface of the rice porridge. Carefully crack one egg into each well. Replace the lid and cook on Low for 15 to 20 minutes until the egg whites are just set but the yolks remain runny. For fully set yolks, cook an additional 5 minutes.
- Turn off the slow cooker. Drizzle sesame oil across the top of the entire pot, then garnish with scallion greens, toasted sesame seeds, and nori strips. Serve directly from the pot, scooping each portion so each bowl receives one whole egg. Season with white pepper at the table.
- Set your electric pressure cooker (such as an Instant Pot) to Saute mode on High. Add 1 tablespoon of neutral oil and let it heat for 1 minute. Add the scallion whites, garlic, and ginger and saute for 1 minute, stirring constantly.
- Add the chopped kimchi and gochujang to the pot. Saute for 3 minutes, pressing the kimchi against the bottom to caramelise it slightly and deepen the flavour. Add the gochugaru and soy sauce and stir to combine.
- Add the cold rice and the reserved kimchi brine plus 120ml (half a cup) of water. Stir firmly to break up any rice clumps and combine all ingredients. The mixture should be moist but not soupy. Press Cancel to turn off Saute mode.
- Seal the lid and set the pressure release valve to Sealing. Cook on Manual (High Pressure) for 5 minutes. When the cycle completes, perform a quick release immediately by carefully switching the valve to Venting. Open the lid once all steam has escaped.
- Use a fork to fluff and separate the rice. The mixture will be cohesive at first but loosens as you stir. Make 4 wells in the rice and crack one egg into each. Replace the lid (do not seal) and select Saute on Low (or use the Keep Warm setting). Allow the residual steam and gentle heat to set the eggs for 5 to 8 minutes, checking regularly until whites are opaque and yolks are cooked to your preference.
- Press Cancel. Drizzle sesame oil over the top and garnish with scallion greens, toasted sesame seeds, and nori strips. Serve immediately, scooping each portion with its own egg.
- Preheat the oven to 190C (375F) with a rack in the centre position. Lightly grease a 23x33cm (9×13 inch) baking dish or a 30cm (12-inch) oven-safe skillet with neutral oil.
- In a large mixing bowl, whisk the 4 eggs with the soy sauce, reserved kimchi brine, gochujang, gochugaru, and sesame oil until completely combined and slightly frothy. This egg mixture will serve as the binding custard for the frittata.
- Add the cold rice, chopped kimchi, garlic, ginger, and scallion whites to the egg mixture. Mix thoroughly with a spatula until every grain of rice is coated and the mixture is homogeneous. Season with white pepper and a small pinch of salt, bearing in mind the kimchi and soy sauce contribute significant sodium.
- Transfer the mixture into the prepared baking dish, spreading it into an even layer and pressing it down gently with the back of the spatula to eliminate air pockets and ensure a cohesive cake that will slice cleanly.
- Bake uncovered for 22 to 25 minutes, until the egg is fully set throughout (a knife inserted in the centre should come out clean), the edges are pulling away slightly from the dish, and the top surface is lightly golden and beginning to crisp. If you want a more caramelised top, switch the oven to broil for the final 2 minutes.
- Remove from the oven and allow to rest for 5 minutes before cutting. This resting period is important as it allows the egg custard to firm up fully for clean slices. Garnish with scallion greens, toasted sesame seeds, and nori strips. Drizzle a small additional amount of sesame oil over each portion if desired before serving.
Nutrition Breakdown
Per 1 serving (makes 4)
Vitamins & Minerals
% Daily Value based on a 2,000 calorie diet (FDA reference)
🧬 Essential Amino Acids
% of recommended daily intake (RDA) per serving
🛡 Antioxidant Profile
The Nutrition Science
The anti-inflammatory potency of this dish is rooted in the intersection of fermentation biochemistry and synergistic nutrient absorption. Traditionally fermented kimchi contains strains of Lactobacillus plantarum, L. sakei, and Leuconostoc mesenteroides that have been shown in randomised controlled trials to reduce fecal calprotectin, a validated biomarker of intestinal inflammation, by up to 38% over a 4-week period of regular consumption. Beyond the live cultures themselves, the fermentation process generates organic acids, particularly lactic and acetic acid, that lower luminal pH, creating a hostile environment for pathogenic bacteria and simultaneously enhancing the bioavailability of minerals including iron and zinc by chelating phytates from the rice.
The combination of capsaicin from gochujang and gochugaru with the non-heme iron in this dish is particularly elegant from a nutritional standpoint. Capsaicin has been shown to stimulate gastric acid secretion and accelerate gastric emptying, both of which improve the conversion of ferric iron (Fe3+) to its more absorbable ferrous form (Fe2+) in the duodenum. At the same time, the vitamin C content from the kimchi (which retains roughly 50 to 80% of its raw cabbage ascorbic acid after moderate fermentation) acts as a classical iron absorption enhancer, reducing Fe3+ to Fe2+ directly in the gut lumen. The combined effect of capsaicin and vitamin C could increase the bioavailability of the dish’s 2.8mg of non-heme iron by a factor of 2 to 3 times compared with consuming iron-containing rice alone.
Resistant starch deserves special mention as a prebiotic compound that works in concert with the probiotic bacteria delivered by the kimchi. When cooked rice is refrigerated overnight and then reheated (or used cold as in this recipe), retrogradation converts a portion of digestible starch into resistant starch type 3. This fraction bypasses digestion in the small intestine and reaches the colon intact, where it serves as a fermentation substrate for Bifidobacterium and Lactobacillus species. The resulting production of short-chain fatty acids, particularly butyrate, provides the primary energy source for colonocytes and has been robustly associated with reduced colonic inflammation, improved insulin sensitivity, and suppression of the NLRP3 inflammasome pathway. Starting your morning with both a prebiotic (resistant starch) and a probiotic (kimchi) in the same bowl represents a textbook example of a synbiotic meal.
Pro Tips
- The single biggest upgrade you can make is using kimchi that has been fermenting for at least 3 weeks. Freshly made kimchi lacks the deep acidity and high bacterial counts of properly fermented kimchi; look for a jar that smells pungent and pleasantly sour, and avoid brands with vinegar listed as an ingredient, as vinegar-acidified kimchi contains no live cultures.
- Never add sesame oil to the pan while it is on the heat. Sesame oil has a moderate smoke point, but more importantly its primary antioxidant compounds, sesamol and sesamolin, begin to degrade above 170C. Always drizzle it over the finished dish off the heat to preserve both its flavour and its anti-inflammatory bioactivity.
- For the stovetop method, if your home burner does not reach very high BTU output, cook the rice in two separate batches rather than crowding the pan. Overcrowding drops the pan temperature dramatically, causing the rice to steam rather than fry, resulting in a sticky, clumped texture instead of individual toasted grains.


Love the concept here, but heads up for anyone with histamine issues like me: kimchi is fermented so it’s quite high in histamine, and eggs (especially if not super fresh) can also be problematic for MCAS folks. I’d suggest either using fresh, raw vegetables with a spicy kick instead (fresh ginger, fresh chilis, wasabi) or swapping the kimchi for quick-pickled veggies made with fresh ingredients that day. The rice and choline benefits are totally there without the fermentation step, and honestly the dish is just as satisfying!
okay this is such a solid point from lorraine about histamine, really appreciate that callout! for post-wod recovery though this combo is fire – that egg protein is complete amino acids and the kimchi’s gonna help with gut inflammation which honestly affects nutrient absorption way more than people realize. if histamine is a concern you could swap the kimchi for fresh sauerkraut or even just fresh ginger and turmeric for that anti-inflammatory punch, but the egg scramble paired with rice is basically my go-to quick refuel window meal.
Great callout from Lorraine on the histamine angle – that’s something I’ve actually tracked pretty closely on my CGM data and it correlates with some interesting inflammatory markers. For anyone looking to optimize this recipe, I’d be curious if you have glycemic impact numbers on the day-old rice versus fresh rice, since resistant starch formation could meaningfully change the postprandial glucose response here. The fermentation and choline combo is solid, but I’ve noticed the actual probiotic CFU content in commercial kimchi varies wildly (often 10^7 to 10^8 per serving depending on storage), so it might be worth noting whether this is meant to be therapeutic dosing or more of