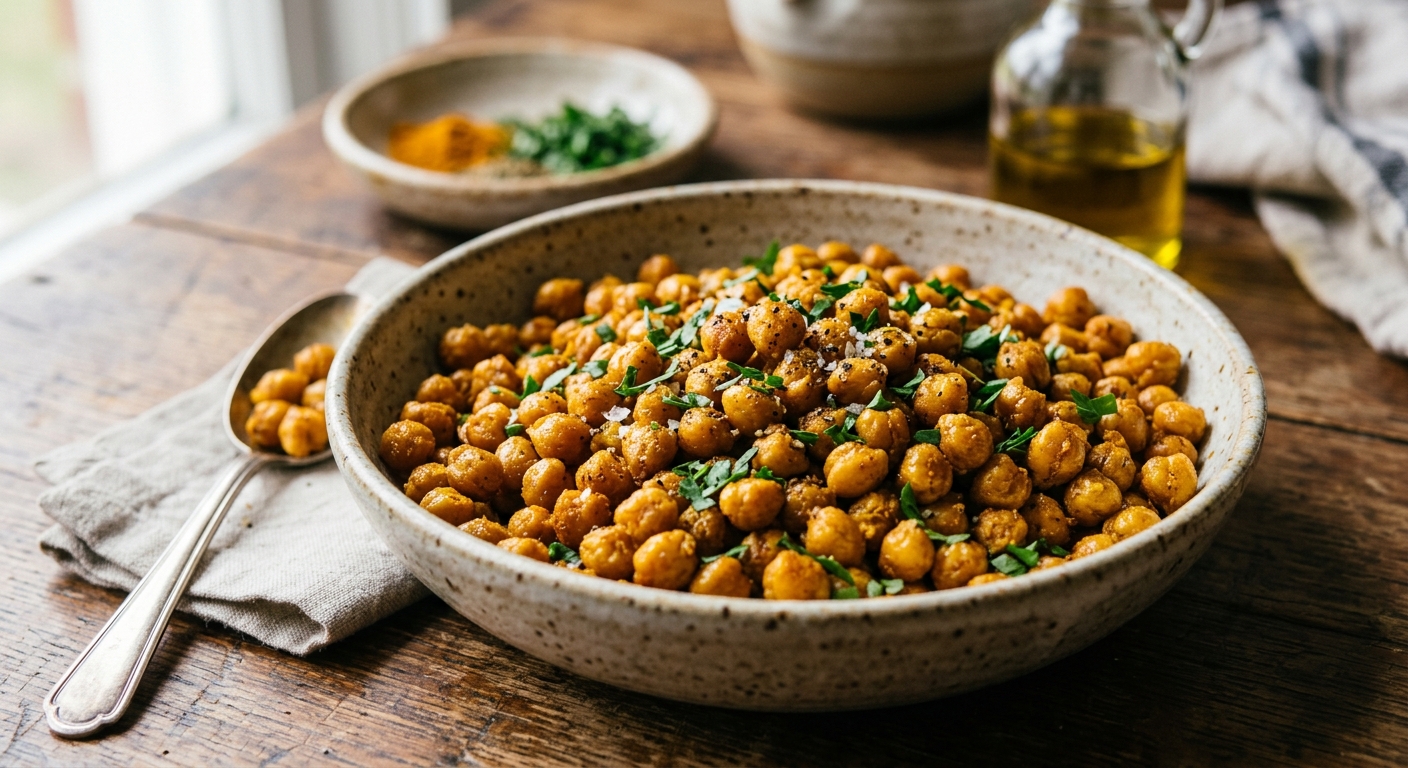
There is a reason turmeric has been central to Ayurvedic medicine for over 4,000 years, and modern nutritional science is finally catching up. When you pair ground turmeric with black pepper and a fat source like extra-virgin olive oil, you create the optimal bioavailability trifecta: curcumin (turmeric’s active compound) absorption increases by up to 2,000% thanks to piperine in black pepper, while fat solubility allows it to be properly absorbed through the gut wall. These roasted chickpeas are not just a snack, they are a delivery system.
Chickpeas themselves are a nutritional powerhouse that rarely gets the spotlight it deserves. A single 200g cooked serving provides roughly 7mg of iron, significant folate for cellular repair, and a protein-fiber combination that blunts post-meal blood sugar spikes. Roasting them at high heat drives off moisture and triggers Maillard browning on the exterior, creating that irresistible crunch while concentrating their earthy, nutty flavor. The result is something that genuinely competes with chips for snack-time satisfaction, but with a nutritional profile that belongs in a different category entirely.
At Calibrated Cuisine, we have developed four distinct cooking methods for this recipe because the texture and flavor goals differ meaningfully depending on your equipment and schedule. The oven produces the signature crunch most people associate with roasted chickpeas. The stovetop skillet method gives you a faster, smokier result with more control. The pressure cooker is perfect if you are starting from dried chickpeas. And the slow cooker, while unconventional, produces a uniquely tender, spiced chickpea perfect for warm grain bowls when crunch is not the priority. Each method is genuinely different, and each one is worth knowing.
4
servings
Ingredients
- 800 gcanned chickpeas (two 400g cans), drained and rinsed
- 3 tbspextra-virgin olive oil
- 2 tspground turmeric
- 1 tspfreshly ground black pepper
- 1 tspground cumin
- 1 tspsmoked paprika
- 0.5 tspground coriander
- 0.5 tspgarlic powder
- 0.25 tspcayenne pepper
- 1.5 tspColima Sea SaltMicroplastic Free Salt
- 1 tsplemon zest (from about 1 lemon)
- 1 tbspfresh lemon juice
- —Fresh flat-leaf parsley, roughly chopped, to serve (optional)
Instructions
Click on an item below to shop for the recommended items for this recipe on Amazon.
As an Amazon Associate, we earn from qualifying purchases.
- Drain and rinse the chickpeas thoroughly, then spread them on a clean kitchen towel or paper towels. Pat very dry and allow to air-dry for 10 minutes. Removing surface moisture is critical for achieving any browning in a skillet rather than steaming.
- In a small bowl, combine the turmeric, black pepper, cumin, smoked paprika, coriander, garlic powder, cayenne, and salt. Stir to mix evenly. Set the spice blend aside.
- Heat a 30cm (12-inch) cast iron or stainless steel skillet over medium-high heat for 2 minutes until properly hot. Add 2 tablespoons of olive oil and swirl to coat. Add the dried chickpeas in a single layer. Do not overcrowd; if your pan is smaller, work in two batches.
- Cook undisturbed for 4 to 5 minutes until the underside of the chickpeas develops a golden-brown blister. Shake the pan vigorously or use a spatula to toss, then cook another 4 to 5 minutes. Continue tossing every 3 to 4 minutes for a total of 18 to 22 minutes until the chickpeas are deeply golden, blistered, and audibly rattling in the dry pan.
- Reduce heat to medium-low. Push the chickpeas to the edges of the pan and add the remaining 1 tablespoon of olive oil to the center. Add the spice blend to the oil and bloom for 30 to 45 seconds, stirring constantly, until fragrant. Immediately toss the chickpeas through the bloomed spices to coat evenly.
- Remove from heat. Add lemon zest and lemon juice, toss once more, and taste for seasoning. Transfer to a serving bowl or spread on a rack to cool for 5 minutes before serving. They will crisp up slightly more as they cool. Scatter parsley over if using.
- Preheat your oven to 220C (425F) with a convection/fan setting if available. Place a large rimmed baking sheet in the oven while it preheats. A hot pan gives the chickpeas an immediate sear from below.
- Drain and rinse the chickpeas. Spread them on a clean kitchen towel and pat thoroughly dry. Roll them around gently to remove the loose outer skins where they naturally detach. Discarding these loose skins significantly improves final crispiness. Allow to air-dry for 10 to 15 minutes while the oven heats.
- In a large bowl, toss the dried chickpeas with 2 tablespoons of olive oil, the salt, and half the spice blend (turmeric, black pepper, cumin, smoked paprika, coriander, garlic powder, and cayenne). Toss well to coat every chickpea evenly. Reserve the remaining half of the spice blend for after roasting.
- Carefully remove the hot baking sheet from the oven using oven mitts. Tip the seasoned chickpeas onto the hot sheet in a single layer, spreading them so no two chickpeas touch if possible. Return to the oven and roast for 20 minutes without opening the door.
- After 20 minutes, shake the pan to roll the chickpeas and expose new surfaces. Roast for another 15 to 20 minutes until they are deeply golden, noticeably shrunken, and sound hollow when one is tapped. Watch carefully in the final 5 minutes to avoid burning.
- Remove from the oven and immediately toss the hot chickpeas with the remaining spice blend (which blooms in the residual heat), the remaining 1 tablespoon of olive oil, the lemon zest, and the lemon juice. The contrast of the bright lemon against the roasted spices is key. Allow to cool on the baking sheet for 10 minutes before serving. They will continue to crisp as they cool. Scatter parsley over if using.
- Drain and rinse the chickpeas but do not dry them. A small amount of residual moisture is fine here. In the slow cooker insert, whisk together the olive oil, turmeric, black pepper, cumin, smoked paprika, coriander, garlic powder, cayenne, and salt until a cohesive spiced oil forms.
- Add the chickpeas directly to the spiced oil in the slow cooker. Stir well to ensure every chickpea is fully coated. Add 60ml (1/4 cup) of water to prevent any scorching on the bottom of the insert during the long cook, and stir again.
- Place the lid on the slow cooker and cook on High for 3 to 4 hours. There is no need to stir during cooking. The chickpeas will absorb the spiced oil and become deeply flavored and very tender with a silky, almost creamy interior. Resist lifting the lid before the 3-hour mark.
- At the 3-hour mark, remove the lid. The chickpeas should be tender, golden-yellow throughout from the turmeric, and the liquid should be largely absorbed. If excess liquid remains, cook uncovered on High for a further 20 minutes to allow it to evaporate.
- Stir in the lemon zest and lemon juice. Taste and adjust salt. Serve warm over a grain base, alongside roasted vegetables, or spooned into wraps. Scatter parsley generously over the top. These chickpeas store well in the refrigerator for up to 4 days and their flavor deepens overnight.
- If starting from dried chickpeas: use 350g of dried chickpeas instead of canned. Rinse them and pick over for stones. Add to the Instant Pot with 1 litre of cold water, 1 teaspoon of salt, and 1 bay leaf. Do not add acids (lemon) or oils at this stage as they affect skin integrity under pressure. Seal the lid, set the valve to Sealing, and cook on High Pressure (Manual or Pressure Cook button) for 40 minutes. Allow a natural pressure release of 15 minutes, then switch to Quick Release for any remaining pressure. Drain the chickpeas, reserving the cooking liquid (aquafaba) for other uses.
- Dry the pressure-cooked chickpeas briefly on a towel, then return the empty Instant Pot insert to the base. Select the Saute function on Medium heat (Normal setting). Add the olive oil and heat for 1 minute until shimmering.
- Add the turmeric, black pepper, cumin, smoked paprika, coriander, garlic powder, and cayenne directly to the hot oil. Stir constantly for 60 seconds to bloom the spices. The mixture will become fragrant and deepen in color. This blooming step is essential for pressure-cooked chickpeas because the high-moisture cooking environment means the spices have not had a chance to toast until now.
- Add the cooked and drained chickpeas to the bloomed spice oil. Stir and fold for 4 to 5 minutes using the Saute function, allowing the chickpeas to absorb the spiced oil and develop light golden patches on their exterior. Press Cancel to stop the Saute function.
- Stir in the salt, lemon zest, and lemon juice. Toss to combine. The chickpeas will be tender with a rich, spiced coating. Taste and adjust seasoning. Serve immediately as a warm dish, or spread on a baking sheet and finish under a broiler (grill) at high heat for 5 to 7 minutes if you prefer some texture on the exterior. Scatter parsley over to finish.
Nutrition Breakdown
Per 1 serving (makes 4)
Vitamins & Minerals
% Daily Value based on a 2,000 calorie diet (FDA reference)
🧬 Essential Amino Acids
% of recommended daily intake (RDA) per serving
🛡 Antioxidant Profile
The Nutrition Science
The anti-inflammatory mechanism of this recipe is not accidental. Curcumin, the polyphenol responsible for turmeric’s vivid yellow color, suppresses nuclear factor kappa-light-chain-enhancer of activated B cells (NF-kB), a master regulator of the inflammatory response. In isolation, however, curcumin is notoriously difficult for the human body to absorb, with oral bioavailability studies showing that it is rapidly metabolized and eliminated. This is where piperine, the alkaloid in black pepper, becomes indispensable: research published in Planta Medica demonstrated that 20mg of piperine consumed alongside curcumin increased curcumin bioavailability by 2,000% in human subjects. The 1 teaspoon of black pepper in this recipe provides roughly 25 to 30mg of piperine, more than enough to trigger this absorption enhancement.
Chickpeas contribute a non-heme iron load of approximately 7mg per serving, roughly 40% of the daily value. Non-heme iron (found in plant foods) has a lower baseline absorption rate than heme iron from animal sources, typically 2 to 20% versus 15 to 35%. However, absorption efficiency is highly diet-context dependent. The vitamin C from lemon juice in this recipe (approximately 8mg) and the presence of curcumin both support iron absorption, while the absence of calcium-rich dairy or high-tannin tea/coffee at the same meal allows uptake to proceed unimpeded. If you are using this recipe to address iron status, the complete day tip above about pairing with broccoli is nutritionally significant, not decorative.
The fiber profile deserves particular attention. Chickpeas are rich in both soluble fiber (including oligosaccharides that act as prebiotics) and insoluble fiber. The 10g of fiber per serving contributes to the low-to-medium glycemic load and supports the growth of beneficial gut microbiota including Bifidobacterium and Lactobacillus species. There is emerging evidence that a diverse, fiber-fed microbiome produces short-chain fatty acids such as butyrate, which themselves have measurable anti-inflammatory effects on the gut epithelium, creating a secondary anti-inflammatory pathway that reinforces the direct curcumin and oleocanthal pathways described above.
Pro Tips
- Drying chickpeas thoroughly before the oven or stovetop method is the single most impactful step for achieving real crunch. Any surface moisture creates steam that softens rather than crisps. Pat dry, then air-dry for at least 10 minutes.
- Bloom your spices. Whether you add them to hot oil in a skillet, to the slow cooker fat, or toss them onto just-roasted chickpeas, heat activates the fat-soluble flavor compounds in turmeric and cumin, producing a dramatically more aromatic and complex result than simply mixing raw spice powder into cold food.
- Store cooled oven-roasted or skillet chickpeas in a paper bag or an uncovered bowl at room temperature for up to 2 days. Airtight containers trap steam and destroy crispiness within hours. For longer storage (up to 5 days), refrigerate in an airtight container and re-crisp in a 200C (400F) oven for 8 minutes before serving.


Love the attention to roasting technique here, Chris – that Maillard reaction is everything for making these actually crave-worthy! I’d just add that chickpeas are such an underrated iron source, especially for folks navigating plant-based eating or those with limited access to diverse protein options. They’re also packed with folate and fiber that work together to actually improve iron absorption, which is something I’ve seen make a real difference in clients’ energy levels. The turmeric and black pepper combo you mentioned definitely supports that bioavailability too, so this recipe is basically stacking wins on top of each other nutritionally.
The roasting temp and timing here are critical – I’d push mine to 425F for a full 35-40 mins with a halfway shake to get that Maillard reaction without burning the turmeric’s volatile oils. Black pepper’s piperine really does enhance curcumin absorption, so the pairing is spot on beyond just flavor. One thing I’ve noticed in my kitchen: most people undersalt roasted chickpeas, which actually suppresses the perception of bitterness from the turmeric and lets the mineral profile shine through better. Might be worth a line about seasoning to taste before serving.
Chris nailed the technique here, and I’d add that the piperine/turmeric synergy Chris mentioned is doing real work on your gut lining and systemic inflammation, which matters if you’re managing any metabolic stuff. That said, I want to gently push back on the iron claim in the title – chickpeas give you good iron content, sure, but it’s non-heme iron which absorbs way less efficiently than heme sources, and the phytates in legumes actually inhibit absorption further. The vitamin C from a squeeze of lemon juice before or after roasting would meaningfully improve bioavailability here, and that’s the kind of detail that separates “feels healthy”