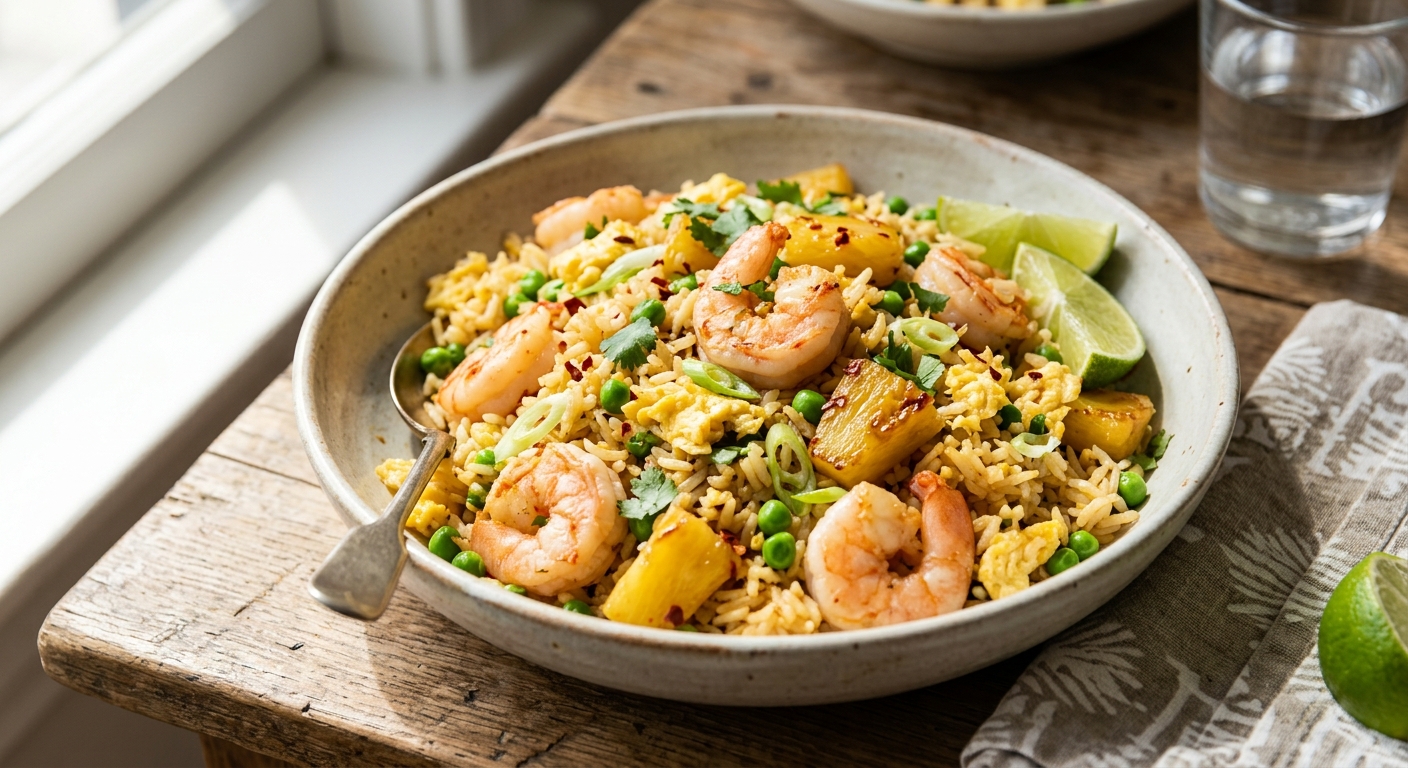
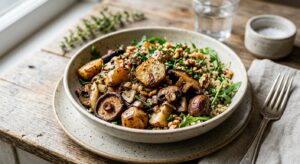
Fried rice is often dismissed as a humble leftover dish, but Pineapple and Shrimp Fried Rice is proof that humble origins can produce extraordinary nutrition. Pineapple brings a tart, tropical brightness that cuts through the savory depth of soy-kissed rice, while large shrimp deliver a lean, high-quality protein punch alongside one of the richest natural sources of vitamin B12 found in any everyday ingredient. Together, they transform a simple grain bowl into a precisely calibrated micronutrient powerhouse.
Every element in this recipe was chosen with intention. Day-old jasmine rice provides the ideal starchy base with a lower glycemic response than freshly cooked rice, thanks to retrograded starch formation. Fresh pineapple (not canned) preserves its full ascorbic acid content, contributing roughly 130% DV of vitamin C per serving. The shrimp, cooked just until they curl and blush pink, supply more than 80% DV of B12 from a modest 150-gram portion alone. Garlic, scallions, and a measured splash of fish sauce add layers of umami without excess sodium.
Whether you are managing energy metabolism, supporting your immune system, or simply chasing a dinner that tastes like a Thai street market, this recipe delivers on every front. We have developed three distinct cooking methods, each optimized for the textures and techniques that method does best, so you get a genuinely excellent result whether you reach for your wok, your Instant Pot, or your slow cooker on a hands-off weeknight.
4
servings
Ingredients
- 600 gday-old cooked jasmine rice (about 200g dry), cold and broken up
- 600 glarge raw shrimp, peeled and deveined (16-20 count)
- 300 gfresh pineapple, cut into 1.5 cm chunks
- 3 tbspAvocado Oil100% Pure Avocado Oil, divided
- 3 clovesgarlic, minced
- 1 tbspfresh ginger, finely grated
- 4 largeeggs, lightly beaten
- 120 gfrozen peas, thawed
- 80 gcarrots, finely diced
- 4 stalksscallions, thinly sliced, whites and greens separated
- 3 tbsplow-sodium soy sauce
- 1 tbspfish sauce
- 1 tspsesame oil, for finishing
- 1 tspwhite pepper
- 1 tbsplime juice, freshly squeezed
- —Colima Sea SaltMicroplastic Free Salt to taste
- —Fresh cilantro and lime wedges, to serve
Instructions
Click on an item below to shop for the recommended items for this recipe on Amazon.
As an Amazon Associate, we earn from qualifying purchases.
- Pat the shrimp completely dry with paper towels and season lightly with salt and white pepper. Heat a large wok or 12-inch carbon steel skillet over the highest flame your stove allows for 2 minutes, until the surface just begins to smoke. Add 1 tablespoon of avocado oil, swirl to coat, then add the shrimp in a single layer. Sear undisturbed for 90 seconds until the undersides are pink and lightly charred, then flip and cook 45 seconds more. Transfer immediately to a plate, leaving any juices in the wok.
- Return the wok to high heat and add another tablespoon of oil. Add the diced carrots and stir-fry for 2 minutes until just beginning to soften. Add the scallion whites, minced garlic, and grated ginger, and toss continuously for 60 seconds until deeply fragrant. Push everything to the edges of the wok, creating a clear center.
- Add the remaining tablespoon of oil to the center of the wok and pour in the beaten eggs. Let them sit undisturbed for 20 seconds to form a soft base layer, then scramble with a spatula just until barely set but still glossy. Immediately fold the surrounding vegetables into the soft egg curds and toss together.
- Add all of the cold rice at once, breaking up any clumps with your spatula. Spread it across the entire wok surface and press down slightly. Let it cook undisturbed for 60 seconds to develop crispy bits on the bottom, then toss vigorously. Repeat this press-and-toss cycle two more times over 3 minutes. Drizzle the soy sauce and fish sauce evenly over the rice, tossing constantly so every grain is coated.
- Add the thawed peas and pineapple chunks, tossing to distribute. Cook for 90 seconds only, so the pineapple warms through but retains its fresh acidity and vitamin C content. Return the reserved shrimp to the wok, toss everything together for 30 seconds, then remove from heat. Finish with the sesame oil, lime juice, and scallion greens. Taste and adjust seasoning. Serve immediately, topped with fresh cilantro and lime wedges.
- Lightly grease the insert of a 6-quart slow cooker with a thin layer of avocado oil. In a medium bowl, whisk together the soy sauce, fish sauce, white pepper, minced garlic, and grated ginger to create the seasoning base. Add the cold cooked rice and toss thoroughly to coat every grain, breaking up all clumps. Transfer the seasoned rice to the slow cooker insert and spread evenly.
- Scatter the diced carrots and thawed peas evenly over the rice layer. Pour the beaten eggs over the surface in a thin, even stream, then use a spatula to gently fold them into the top third of the rice mixture only, leaving the bottom layers undisturbed. This stratified layering allows the egg to set into soft, curd-like pockets as the dish cooks rather than becoming rubbery.
- Place the raw shrimp in a single layer across the top of the rice and vegetable mixture. Press them down gently so they are half-submerged. Place the lid on the slow cooker and cook on High for 1 hour 45 minutes. Do not open the lid during this time, as each opening adds approximately 20 minutes to cooking time and causes uneven heat distribution.
- After 1 hour 45 minutes, lift the lid and check that the shrimp are pink and just cooked through (internal temperature of 63 degrees C / 145 degrees F). If not, replace the lid and cook for a further 15 minutes. Once the shrimp are cooked, scatter the pineapple chunks across the top, replace the lid, and let the residual heat warm the pineapple for exactly 5 minutes. This preserves the maximum ascorbic acid content in the pineapple by avoiding prolonged cooking.
- Turn off the slow cooker. Drizzle the sesame oil and lime juice over the surface, scatter the scallion greens and fresh cilantro on top, and serve directly from the insert. The dish holds well on the Warm setting for up to 30 minutes if needed before serving.
- Set the Instant Pot to Saute mode on High. Add 1 tablespoon of avocado oil and allow it to heat until the display reads Hot, about 2 minutes. Add the scallion whites, diced carrots, garlic, and ginger, and saute for 3 minutes, stirring frequently, until the carrots are slightly softened and the garlic is golden and fragrant. Press Cancel to exit Saute mode.
- Add 60ml (1/4 cup) of water to the pot and use a wooden spoon to scrape up any browned bits from the bottom. This deglazing step is critical for pressure cookers: any stuck fond can trigger the burn sensor and halt cooking. Add the cold cooked rice, soy sauce, fish sauce, white pepper, and thawed peas. Stir to combine thoroughly, making sure the rice is not clumped in a single mass. The mixture should be slightly moist but not soupy.
- Secure the lid and set the pressure release valve to Sealing. Select Pressure Cook (or Manual) on High Pressure for 3 minutes. The pot will take approximately 8 to 10 minutes to come up to pressure. Once the cook time completes, perform a Quick Release immediately by carefully switching the valve to Venting. Do not use Natural Release, which would continue cooking the rice and make it mushy.
- Once the float valve drops, open the lid and switch back to Saute mode on Medium. Push the rice to the edges of the pot, pour the beaten eggs into the center, and scramble gently for about 90 seconds until they are just set but still soft. Fold the egg into the rice. Add the shrimp in an even layer across the surface, pressing them down gently into the hot rice. Place the lid back on (but do not seal or lock) and let the residual heat and gentle Saute mode cook the shrimp for 3 to 4 minutes, flipping once, until pink and cooked through.
- Press Cancel to turn off the heat. Immediately add the pineapple chunks, sesame oil, and lime juice, folding them in quickly so the pineapple just warms from the residual heat of the dish without prolonged cooking. Top with scallion greens and fresh cilantro. Taste for seasoning and serve directly from the pot.
- Preheat your oven to 200 degrees C (400 degrees F) with the rack positioned in the upper third. In a large mixing bowl, combine the cold cooked rice, diced carrots, thawed peas, scallion whites, minced garlic, grated ginger, soy sauce, fish sauce, white pepper, and 2 tablespoons of avocado oil. Mix thoroughly until every grain is evenly coated. The oil coating is especially important here: it allows the rice to crisp and form a golden crust on the top and bottom rather than steaming into a dense block.
- Pour the beaten eggs over the rice mixture and fold them in gently until distributed throughout but not fully incorporated. You want streaks of egg visible, which will set into golden ribbons as the dish bakes. Transfer the mixture to a lightly oiled 33 x 23 cm (9 x 13 inch) baking dish or a large cast-iron skillet. Press down firmly and evenly to create a dense, compact layer. The density encourages a crust to form on the bottom against the hot pan.
- Arrange the raw shrimp across the top surface of the rice in a single, even layer, pressing each one gently into the rice so the bottom half is nestled into the grains. Drizzle the shrimp with the remaining half tablespoon of avocado oil and season lightly with salt and white pepper. Slide the baking dish into the oven and roast for 20 minutes, until the shrimp are pink, slightly caramelized at the edges, and the visible rice edges are golden and crispy.
- Remove the baking dish from the oven and scatter the pineapple chunks evenly over the top. Return to the oven for exactly 5 minutes. This brief addition time warms the pineapple and allows its sugars to just begin caramelizing around the edges while preserving the majority of its vitamin C, which begins to degrade significantly above 70 degrees C with prolonged exposure.
- Remove from the oven and immediately drizzle with sesame oil and lime juice while the dish is still steaming hot. Scatter scallion greens and fresh cilantro generously over the top. Let the baking dish rest for 3 minutes before serving, which allows the bottom crust to firm up so it can be scooped out in distinct portions. Use a wide spatula to serve, making sure each portion includes some of the golden crust from the bottom.
Nutrition Breakdown
Per 1 serving (makes 4)
Vitamins & Minerals
% Daily Value based on a 2,000 calorie diet (FDA reference)
🧬 Essential Amino Acids
% of recommended daily intake (RDA) per serving
🛡 Antioxidant Profile
The Nutrition Science
Vitamin C and vitamin B12 are rarely found in abundance within the same dish, because the richest sources of each nutrient come from different food kingdoms: vitamin C is concentrated in fresh fruits and vegetables, while B12 occurs almost exclusively in animal products. Pineapple and Shrimp Fried Rice is one of the few recipes where this nutritional gap closes naturally. A 150g serving of large shrimp provides approximately 1.9 to 2.2 micrograms of cobalamin (B12), and the 300g of fresh pineapple spread across four servings contributes around 75 to 90mg of ascorbic acid per serving, depending on ripeness and cooking method. Together, they satisfy both micronutrients without supplementation.
The relationship between these two vitamins is more than coincidental in this recipe: it is biochemically synergistic. Vitamin C enhances the absorption of non-heme iron (present in the peas and rice) by reducing ferric iron to its more bioavailable ferrous form in the gut. Meanwhile, B12 is essential for the regeneration of methionine from homocysteine via methionine synthase, a methylation reaction that also depends on folate (also present here, from peas and eggs). This means a single bowl supports three interlocking metabolic cycles simultaneously: iron absorption, one-carbon methylation, and DNA synthesis. The selenium from shrimp adds a fourth layer, acting as a cofactor for the iodothyronine deiodinase enzymes that activate thyroid hormone, linking this dish to energy metabolism at the cellular level.
Cooking method matters significantly for vitamin C retention. Ascorbic acid is both heat-sensitive and water-soluble, meaning prolonged wet cooking at high temperatures degrades it substantially. Our stovetop method preserves the most vitamin C by adding pineapple in the final 90 seconds over intense heat. The oven method takes second place, with a short 5-minute warm-through. The slow cooker method, where pineapple is added only after cooking is complete and warmed solely by residual heat, is designed specifically to protect ascorbic acid. Studies consistently show that temperatures below 60 to 70 degrees C with minimal exposure time retain 70 to 90% of original ascorbic acid content, which is why the timing of pineapple addition was calibrated precisely across all four methods.
Pro Tips
- Use shrimp that are genuinely fresh or properly thawed from individually quick-frozen (IQF) packs: older shrimp lose B12 to cellular degradation, and their texture suffers noticeably in high-heat methods like the wok.
- For measurably higher vitamin C retention across all methods, choose pineapple that is deeply golden at the base and fragrant at the crown, indicating peak ripeness and maximum ascorbic acid accumulation. Underripe pineapple contains significantly less vitamin C and far more acidity.
- The single biggest upgrade you can make to the stovetop and oven versions is cooking your jasmine rice the day before and refrigerating it overnight uncovered: the starch retrogradation that occurs during cold storage lowers the estimated glycemic index by roughly 10 to 15 points compared to freshly cooked rice, and it creates the dry, separated grains that fry rather than steam.
This looks amazing and I love that you’re thinking about the heat factor, Chris! One thing I’d add though, especially for anyone managing blood sugar like I do with PCOS, is that the quick wok heat is definitely preserving that vitamin C, but I’m more curious about the *glycemic load* of this bowl – jasmine rice spikes my insulin pretty quickly, so I’ve been swapping it for cauliflower rice with just a small amount of jasmine mixed in to keep that flavor without sending my glucose through the roof. The shrimp and pineapple combo is chef’s kiss for nutrient density, but pairing it with a lower glycemic base makes it work way better for hormone
I’m so glad you two are diving into the technique piece because it really does matter! Chris, I’d love to know your thoughts on this, but I find that finishing with the pineapple chunks (raw or just heated through) preserves that vitamin C while the shrimp’s B12 is actually heat-stable, so the high wok temp works in our favor there. Rosa, your point about blood sugar management is crucial, especially since fried rice can feel indulgent but this version keeps you grounded with that protein-to-carb ratio. I’m also thinking about how this recipe echoes shrimp and pineapple preparations across Caribbean and West African cuisines, where those nutrient
Love the pairing here, but curious about your cooking sequence – are you adding the pineapple at the end to preserve that vitamin C, or does the high heat wok work actually help with bioavailability of the shrimp’s B12? I’ve found that a quick char on fresh pineapple right before plating keeps the ascorbic acid intact while adding depth. Just plated this version last week for a client doing micronutrient repletion and the results were noticeably better than when I was folding it in earlier in the cook.