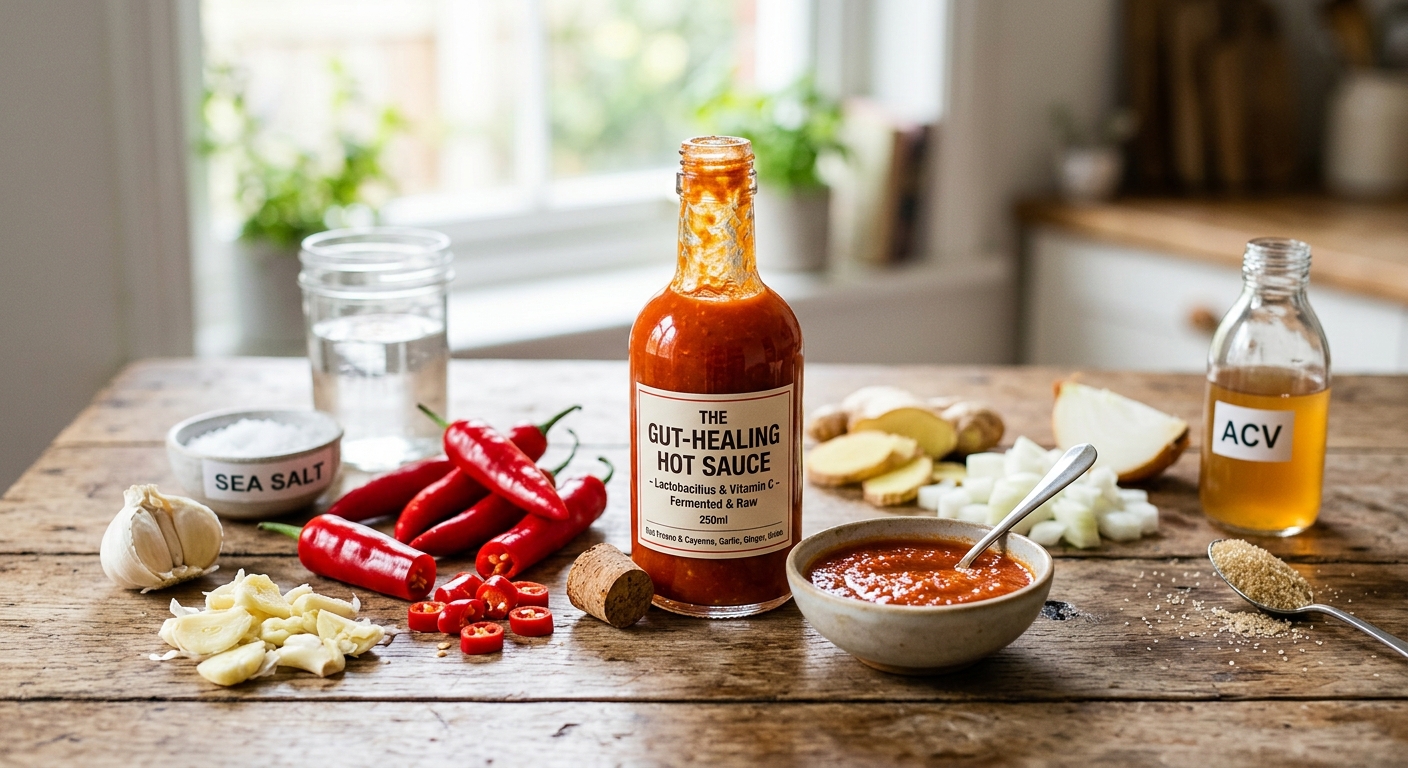
Most hot sauces are simply cooked and bottled, killing every beneficial microorganism in the process. This recipe flips that script by starting with a traditional lacto-fermentation brine, allowing wild and added Lactobacillus bacteria to colonise the chillies over three to five days before any heat is applied. The result is a sauce with extraordinary depth: bright acidity from lactic acid, complex umami undertones, and a slow, radiant burn that commercial sriracha cannot replicate. Because fermentation is the foundation, each finishing method produces a meaningfully different product, from a raw probiotic sauce on the stovetop to a deeply caramelised slow-cooked version.
The nutritional case for this condiment is genuinely compelling. Fresh red chillies are among the most vitamin C-dense foods on the planet, providing roughly 144 mg per 100 g, which means a modest two-tablespoon serving of this sauce can contribute more than 30% of your daily vitamin C RDI. They also supply vitamin B6, potassium, and the alkaloid capsaicin, which has been studied extensively for its ability to inhibit NF-kB signalling, one of the primary inflammatory pathways implicated in metabolic disease, arthritis, and cardiovascular risk. Garlic adds allicin and quercetin, while ginger contributes gingerols and shogaols, creating a triple anti-inflammatory synergy in every drop.
The fermentation step is not optional decoration; it is the mechanism that transforms this from a condiment into a functional food. During lacto-fermentation, Lactobacillus plantarum and related species consume sugars and produce lactic acid, lowering pH to around 3.5 and preserving the sauce naturally without vinegar. These live cultures survive in the finished raw version and support the gut microbiome by competing with pathogenic bacteria, producing short-chain fatty acids, and enhancing intestinal barrier integrity. If you choose a cooked finishing method, the probiotic cultures are reduced but the fermentation-derived organic acids, bioavailable nutrients, and antioxidant compounds remain fully intact.
32
servings
Ingredients
- 500 gfresh red Fresno or cayenne chillies, stems removed, roughly chopped
- 6 clovesgarlic, peeled and smashed
- 20 gfresh ginger, peeled and roughly chopped
- 1 mediumwhite onion, roughly chopped
- 2 tspnon-iodised Colima Sea SaltMicroplastic Free Salt (for brine)
- 480 mlfiltered or unchlorinated water (for brine)
- 1 tspraw cane sugar or honey (to feed fermentation)
- 2 tbspapple cider vinegar (added after fermentation, for stovetop raw version)
- 1 tbspextra-virgin olive oil
- 1 tspground cumin
- 0.5 tspsmoked paprika
- —Colima Sea SaltMicroplastic Free Salt to taste after blending
Instructions
Click on an item below to shop for the recommended items for this recipe on Amazon.
As an Amazon Associate, we earn from qualifying purchases.
- Make the fermentation brine: dissolve 2 tsp non-iodised sea salt and 1 tsp raw sugar in 480 ml filtered water at room temperature, stirring until fully dissolved. Do not use tap water if it contains chlorine, as chlorine inhibits beneficial bacteria. If tap water is all you have, let it sit uncovered for 30 minutes to off-gas chlorine before using.
- Pack the chopped chillies, smashed garlic, ginger, and onion tightly into a clean 1-litre glass jar. Pour the brine over the vegetables, ensuring all solids are submerged. If needed, weigh the vegetables down with a small zip-lock bag filled with extra brine or a fermentation weight. Leave 3 to 4 cm of headspace at the top. Cover the jar loosely with a cloth secured with a rubber band, or use an airlock lid if you have one, to allow CO2 to escape while keeping contaminants out.
- Ferment at room temperature (ideally 18 to 24C / 65 to 75F) for 3 to 5 days. After 24 to 48 hours, you should see small bubbles rising through the brine, indicating active fermentation. Press the vegetables down once or twice daily to keep them submerged. The brine will turn cloudy and slightly tangy, which is correct. If you see fuzzy mould (not white film, which is harmless kahm yeast), discard and start again.
- After 3 to 5 days, taste a chilli. It should taste pleasantly sour, tangy, and deeply flavoured. When you are satisfied, drain and reserve the brine. Transfer the fermented vegetables to a high-powered blender. Add 2 tbsp apple cider vinegar, 1 tbsp olive oil, 1 tsp cumin, and 0.5 tsp smoked paprika.
- Blend on high for 60 to 90 seconds until completely smooth. Add reserved fermentation brine a tablespoon at a time to reach your desired consistency, anywhere from thick and sriracha-like to pourable and Louisiana-style. Taste and adjust salt. Do not heat the sauce at any point. Pour into sterilised glass bottles or jars and refrigerate immediately. The raw probiotic sauce keeps refrigerated for up to 3 months and its flavour deepens over time.
- Complete the full 3 to 5 day lacto-fermentation as described in the stovetop method steps 1 through 3. The fermentation step is still essential here because it develops the complex lactic acid flavour base that makes this sauce distinct from a simple cooked hot sauce. Drain the fermented vegetables and reserve the brine separately.
- Place the drained fermented chillies, garlic, ginger, and onion directly into the slow cooker insert. Add olive oil, cumin, smoked paprika, and 120 ml of the reserved fermentation brine. Do not add the apple cider vinegar yet. Stir to combine. The mixture will look quite thick and chunky at this stage.
- Cook on Low for 4 hours with the lid slightly ajar (prop it open about 1 cm with a chopstick or wooden spoon). The ajar lid allows moisture to evaporate slowly, concentrating the flavour and deepening the colour from bright red to a rich burnt-orange. The low, moist heat also allows the capsaicin to penetrate the cell walls more thoroughly, creating a more rounded, lingering heat rather than a sharp spike.
- After 4 hours, the mixture should be very soft, fragrant, and slightly reduced. Transfer everything to a blender, add the 2 tbsp apple cider vinegar and any remaining reserved brine needed for consistency. Blend on high for 90 seconds until completely smooth and glossy. For an ultra-smooth restaurant-style sauce, strain through a fine-mesh sieve, pressing with a spatula to extract maximum sauce.
- Return the blended sauce to the slow cooker on the Keep Warm setting for 15 minutes to meld the vinegar into the sauce, stirring once. Taste and adjust salt. Pour into sterilised glass jars and refrigerate once cool. This cooked version keeps refrigerated for up to 6 months.
- Complete the 3 to 5 day fermentation process as outlined in stovetop steps 1 through 3. Once fermented, drain the vegetables and reserve all brine. The pressure cooker version benefits from a full 5-day ferment rather than 3 days, as the extended fermentation compensates for the shorter cooking window in terms of flavour depth.
- Set the Instant Pot or electric pressure cooker to the Saute function on High. Add the olive oil and heat for 1 minute. Add the drained fermented chillies, garlic, ginger, and onion in a single layer as much as possible. Saute without stirring for 3 to 4 minutes until the bottom of the vegetables begins to brown and stick lightly to the pot. This initial sear creates Maillard compounds before pressure cooking, adding a toasty complexity absent from the slow cooker version.
- Deglaze with 60 ml of the reserved fermentation brine, scraping up all the browned bits from the bottom with a wooden spoon. This step is critical: any stuck fond left on the bottom can trigger a burn warning. Add the cumin and smoked paprika and stir well. Cancel the Saute function.
- Seal the lid and set to High Pressure for 8 minutes. The pressure environment drives the capsaicin, garlic thiosulfinates, and ginger gingerols deep into the cell structure, producing a more integrated, complex heat. Allow a natural pressure release for 10 minutes, then carefully quick-release any remaining pressure.
- Open the lid and transfer the contents to a blender along with the 2 tbsp apple cider vinegar. Start blending on low and gradually increase to high, blending for 90 seconds. Add reserved fermentation brine as needed for consistency. Taste and adjust salt and acid. For a thinner sauce, strain through a fine-mesh sieve. Bottle in sterilised jars and refrigerate. This version keeps for up to 6 months refrigerated.
- Complete the 3 to 5 day fermentation as described in stovetop steps 1 through 3. Drain the fermented vegetables thoroughly and pat them dry with paper towels. Drying the surface is important here because excess brine on the vegetables will steam them in the oven rather than allowing them to roast and char. Reserve the fermentation brine for later use.
- Preheat your oven to 200C (400F) with the fan on if available (fan-forced roasting accelerates caramelisation). Line a heavy rimmed baking sheet with parchment paper. Spread the fermented chillies, garlic, ginger, and onion in a single layer, ensuring the pieces are not overlapping. Drizzle with the olive oil, sprinkle cumin and smoked paprika over the top, and toss to coat evenly.
- Roast on the middle-upper rack for 35 to 40 minutes, turning the vegetables once halfway through at the 18-minute mark. You are looking for significant charring on the edges and tips of the chillies, and caramelisation on the onion and garlic. The tips of the chillies should be blackened in spots. This controlled char is the signature of this version and contributes smokiness without any added smoked ingredients beyond the paprika.
- Remove from the oven and allow the vegetables to cool on the baking sheet for 10 minutes. During this time, the residual steam loosens any stuck bits and the sugars stabilise. Transfer everything, including any caramelised juices on the parchment, to a blender. Add 2 tbsp apple cider vinegar and blend on high for 90 seconds until smooth.
- Add reserved fermentation brine a tablespoon at a time to reach your desired thickness. The roasted version typically needs less brine because roasting has already concentrated the flavours. Taste carefully, as roasting intensifies both the heat and saltiness. Adjust salt sparingly. Strain through a fine-mesh sieve for a smooth sauce, or leave unstrained for a rustic, textured result. Bottle in sterilised jars and refrigerate for up to 6 months.
Nutrition Breakdown
Per 1 serving (makes 32)
Vitamins & Minerals
% Daily Value based on a 2,000 calorie diet (FDA reference)
🧬 Essential Amino Acids
% of recommended daily intake (RDA) per serving
🛡 Antioxidant Profile
The Nutrition Science
The scientific foundation of this recipe rests on lacto-fermentation, one of the oldest and best-validated forms of food preservation. When fresh chillies are submerged in a 2% salt brine, the salt selectively inhibits pathogenic bacteria while allowing salt-tolerant Lactobacillus species, both naturally present on the chilli skin and optionally added as a starter, to proliferate. These bacteria perform homo- and heterofermentative metabolism of available sugars, producing lactic acid, acetic acid, carbon dioxide, and a range of flavour compounds including diacetyl, acetaldehyde, and exopolysaccharides. Within 48 to 72 hours, the pH drops to approximately 3.4 to 3.8, a range that inhibits virtually all spoilage organisms and creates the sauce’s characteristic sour tang.
Capsaicin, the primary bioactive alkaloid in chillies, has been the subject of over 1,500 peer-reviewed studies. It binds selectively to the TRPV1 (transient receptor potential vanilloid 1) channel, a heat-sensing ion channel expressed on pain neurons and, crucially, on immune cells throughout the gastrointestinal tract. Chronic low-dose activation of TRPV1 by dietary capsaicin has been associated in clinical studies with reduced levels of C-reactive protein (CRP), interleukin-6 (IL-6), and tumour necrosis factor-alpha (TNF-alpha), all hallmark inflammatory biomarkers. Fermentation may enhance capsaicin bioavailability by partially breaking down the cell wall matrix of the chilli pepper, releasing bound capsaicinoids that would otherwise pass unabsorbed through the gut.
The probiotic dimension of the raw stovetop version adds another layer of clinical relevance. Lactobacillus plantarum, consistently identified in vegetable ferments of this type, has been shown in randomised controlled trials to modulate the gut-brain axis, reduce intestinal permeability (often called leaky gut), and competitively exclude pathogenic Gram-negative bacteria. When consumed regularly as a condiment, even small doses of viable lactic acid bacteria (typically 10 to the 7th to 10 to the 8th CFU per serving at peak fermentation) can shift the relative abundance of beneficial Firmicutes and Bacteroidetes in the gut microbiome, supporting both local immune tolerance and systemic anti-inflammatory status.
Pro Tips
- Use non-iodised salt exclusively for fermentation; iodine is an antimicrobial agent added to table salt specifically to kill bacteria, and it will inhibit or kill the Lactobacillus cultures you are trying to cultivate.
- The heat level is entirely controlled by your chilli choice: Fresno chillies give a medium, fruity heat (2,500 to 10,000 SHU), cayenne gives sharp intense heat (30,000 to 50,000 SHU), and a blend of both gives complexity. Removing seeds before fermenting reduces heat by approximately 40%.
- To test if your stovetop raw sauce still contains live cultures after bottling, leave a jar at room temperature for 24 hours; if the lid bulges slightly from CO2 production, your cultures are active. Refrigerate immediately after confirming viability, and burp the lid every few days for the first two weeks.
This is such a smart formulation, especially pairing the vitamin C with live lactobacillus since ascorbic acid can actually enhance mineral absorption during fermentation and support the probiotic strains themselves. I’ve noticed in my pharmacy practice that patients on high-dose vitamin supplements sometimes miss these synergistic food combos entirely, so seeing fermented hot sauce hit multiple anti-inflammatory pathways at once is genuinely useful. One small note for anyone on warfarin or similar anticoagulants: the vitamin K from the fermentation process is minimal compared to leafy greens, but it’s worth a quick chat with your pharmacist if you’re managing INR closely. Are you finding the homemade
omg YES this is exactly the kind of thing ive been trying to get my kids to eat more of!! the probiotics plus vitamin c combo is CHEF’S KISS and i love that its fermented so its way easier on their digestion than raw hot sauce. my question is how spicy can you make it and still have it be kid-friendly? like i want my picky eater to actually eat it without it being too intense, bc honestly the nutrient density here is too good to pass up and id love to sneak it into their meals somehow!
This is exactly the kind of condiment I’ve been building into my MS protocol, so thank you for laying out the nutritional mechanics so clearly. The vitamin C and live cultures together are genuinely helpful for managing neuroinflammation, and honestly, the fact that it’s fermented makes it something my gut can actually process without triggering a flare is huge. I’m curious about your fermentation timeline – do you find the lactobacillus activity stabilizes after a certain point, or does it keep evolving in the jar?